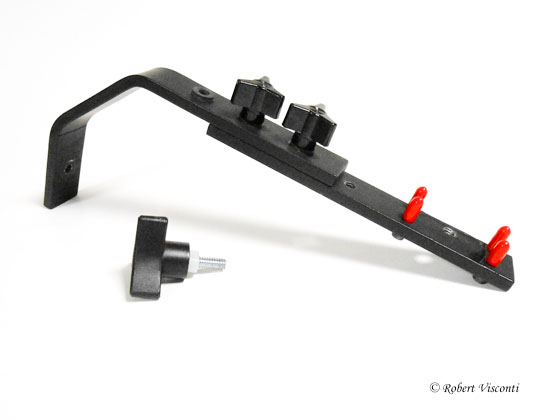
Keeping on pace with my last post regarding external flash units, I’ve decided to show you one of my “do-it-yourself” (DIY) projects: building an external flash bracket. Having the majority of my lenses fitted with the same quick-release plates, this flash bracket mounts to all of them with ease and full versatility. Check it out:
What Is a Flash Bracket?
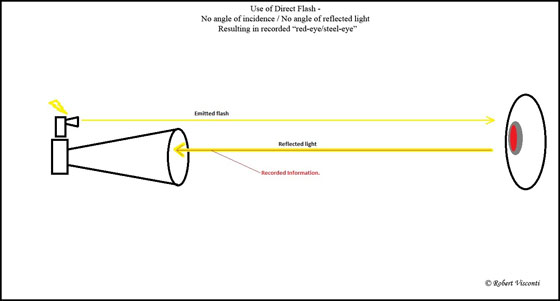
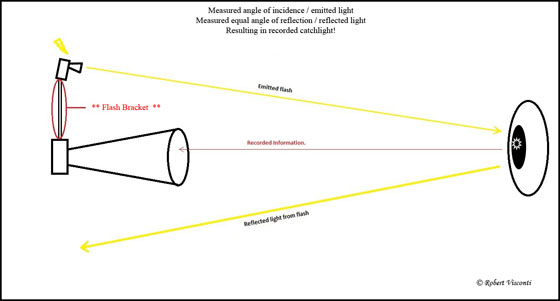
Soon after I purchased my Better-Beamer, I started looking at external flash brackets for the long lenses. A flash bracket locates the external flash unit off (and, more importantly: higher up) from the lens. The main objective is to reduce the effects of “steel-eye / red-eye” in the subject’s eye. The reduction is achieved by re-directing the reflected light away from the optical axis (the solid red “recorded information” line in the diagram below). In physics, it’s called the Law of Reflection – the angle of directed light (incidence) is equal to the angle of reflected light.
The bottom line is if you come straight in on a subject with light from a flash, it’s all going to be recorded right back into the lens (optical axis). I personally am much better with conceptual diagrams so I drew these up in the hopes that you’ll see what I’m trying to explain:
If you can bring that light in at an angle, then the reflected light will also be angled away from the optical axis thereby recording far less reflected light….maybe even resulting in only a catchlight—exactly what you want!
How to Build a Flash Bracket
A quick Google search yielded price tags between $100-200 and sometimes even more for brand name flash brackets. After researching the plethora of brackets with their unique shapes and designs, I soon considered the idea of trying to make one myself; after all it’s really just an “extension pole” that allows the external flash to be located higher up and off the camera.
And, I was fine without having chamfered edges, professional paint work, a polished finish, and probably a little more versatility knowing there would be a huge savings. There really isn’t any hard and fast rule to its design either; for me, I knew I wanted to allow for vertical adjustment, tilt, and universal fit for my lenses.
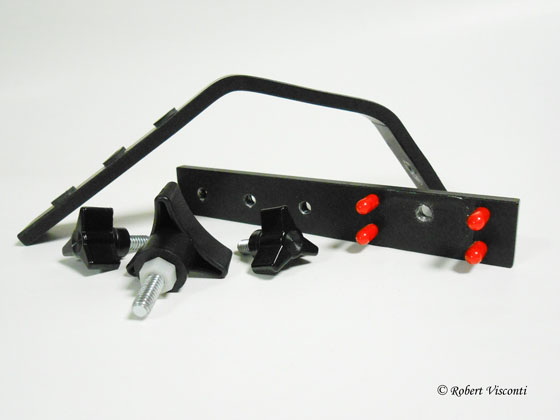
I built mine with a very basic set of tools (hacksaw, drill, vise, pliers, file, ruler, and hammer) aside from a couple of taps needed to make the threads in the holes drilled into the bracket; no CNC machine / no six-figure machine shop here! $25.00 afforded me the aluminum stock bar (1/4″ thick – 1″ wide – various lengths available), all the knobs 1/4 – 20 thread, vacuum caps, and spray paint-all from the “Big-Box” stores.
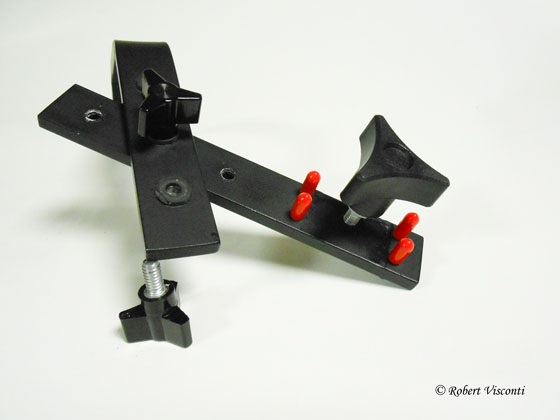
Of course, the flash cord was extra but you’re not getting the cord with the big dollar purchases either. It’s a two-piece assembly which allows me to make those vertical adjustments as well as slight forward/rearward tilting as needed.
It also packs into a smaller pouch when not in use. The location of the holes was critical as they have to be equally spaced to accommodate each other under various heights. What I did was stack the two pieces of aluminum on top of one another and drilled straight through the two after making sure all three holes were equally spaced:

I chose to make two 45 degree bends on the upper section of my bracket instead of just one 90 degree. Since I was using only a small vise, and had no heat, I found it easier to make two less aggressive bends rather than just one. You’ll still come out at 90 degrees in the end and it looks a little nicer too (IMO):
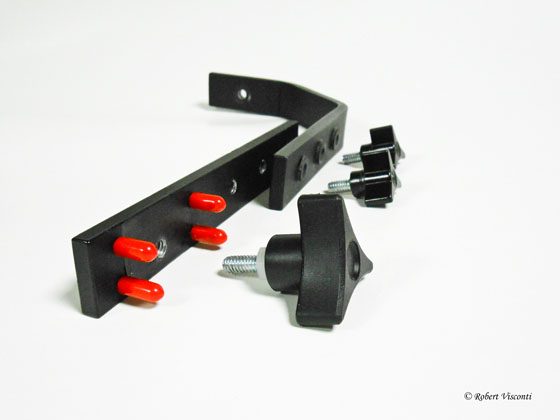
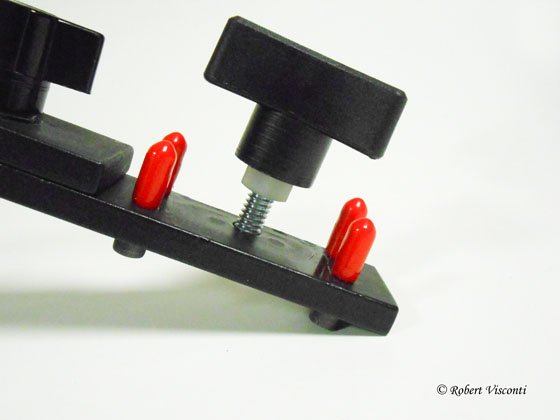
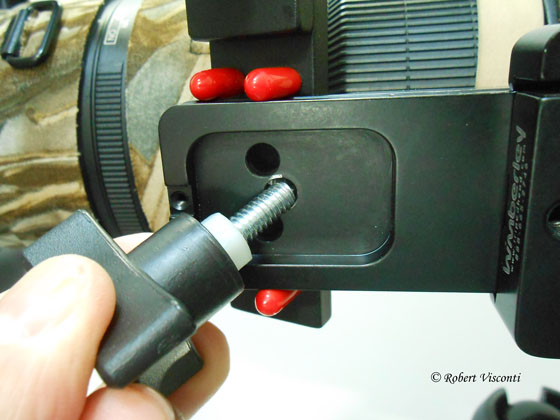
Also, the four bolts that have the orange vacuum caps have to be drilled under very close tolerances because, with my design, these “fit” over my C-12 plate:
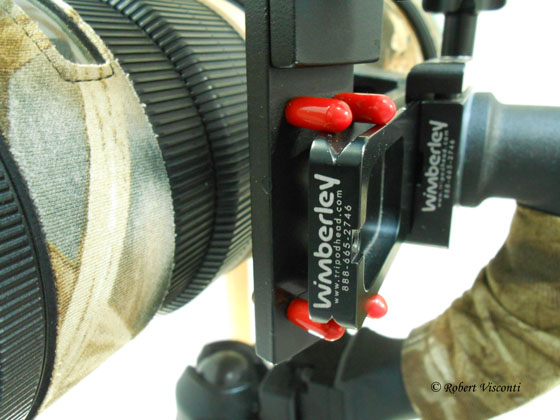
One large 1/4 -20 knob is all that is needed to secure the entire bracket into place on any one of my C-12 plates:
No drilling into the C-12 plate was necessary as I used one of the existing holes already there:
And again, the entire project was done in my garage on a simple workbench. A good tip….after you mark the location for your holes to be drilled, use a center punch first so your drill bit won’t dance around the metal surface and start cutting in the wrong area.
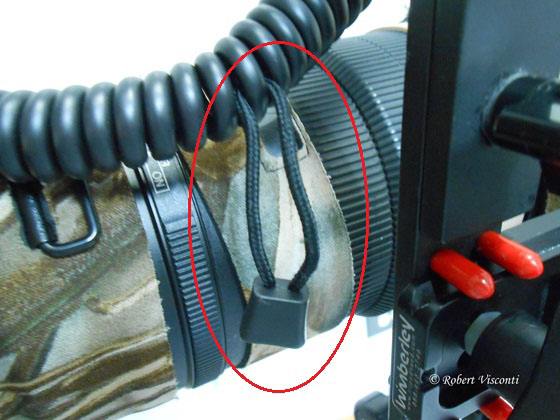
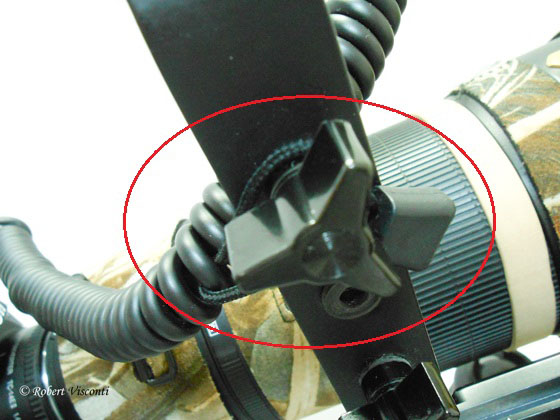
Once assembled and mounted with the flash cord in place I found that a little jacket zipper pull I had laying around was perfect to hold the cord up and away so it would not interfere with my rotating of the lens from landscape to portrait – I just wrap it around any one of the available adjustment knobs:
Here is a shot of the entire set up:
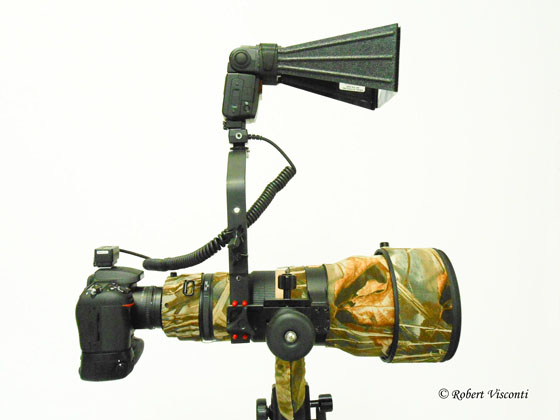
This bracket, as mentioned earlier, adapts to one of my smaller combinations too:
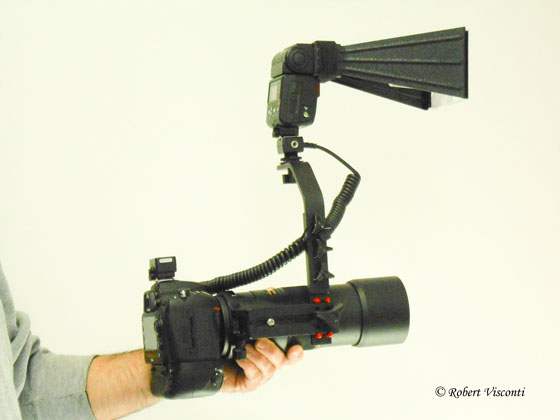
The above Nikon 300mm f/4 works very well with a 1.4X teleconverter and not too bad with a 1.7X. The flash, in this setup, often serves as a means for some fill light although its combined weight becomes a factor when handheld for extended periods of time. Mounted on a tripod though, there is no issue.
Good luck with the design of your DIY Bracket!!
Get more great tips in our free weekly newsletter.

 About the Author: Robert Visconti resides in Lake County, IL. Robert has always had an appreciation for wildlife, even during his childhood years. In 2006, he purchased his first DSLR camera and has since then been photographing wildlife as often as time permits. He is a contributing photographer for the Lake County Forest Preserve District and has been published in a variety of magazines and catalogs. A nice collection of his work can be found on his Flickr page: https://www.flickr.com/photos/39692426@N00/
Great article and project. I love building things and saving money in the process. Can’t wait to start this one.
Thanks,
Hi Robert and thank you for the instructions. I made one using your ideas but am now trying to improve on it. I need to know, what is the height you were going for and what is the hardware around the holes that look like skinny nuts. How did you attach them? Aalso, did you do anything in particular with the painting?
Thanks Ned
Hi Ned,
Thanks for reaching out.
* The higher, the better! Another reason why I made a series of holes on the brackets – to increase/decrease the height as needed. It works fine with just two of the threaded knobs in place which gives me a little more height. You can get an idea of the bracket length based on some of the images but using the last image as a reference from the bottom of the lower bracket to the attachment point for the flash mount is 10 inches.
* The “hardware” you are referring to are just little rubber washers as I don’t want to “crank” down on the aluminum threads in the bracket.
* Those rubber washers would likely fall of quite easily if left in place. They stuck in place only because I had just disassembled it for the pictures. No magic here.
Hope this helps,
Best of luck – huge improvement on the images, just keep the flash output to a minimum in order to keep it natural.
Robert