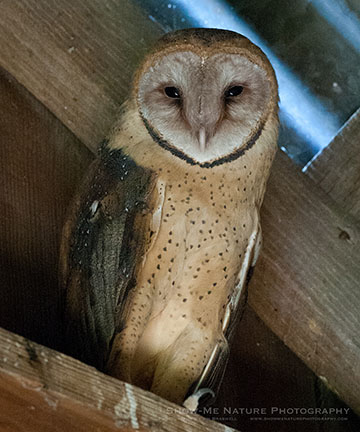
Have you ever tried to capture that great wildlife shot in low light? It’s often not easy, is it? Such is the case of capturing this rare and endangered Barn Owl in a Missouri barn:

In Missouri, loss of habitat and farms, including barns where the Barn Owl prefers to live, have caused the Barn Owl to be placed on the state’s endangered list. In fact, the above owl is only the second Barn Owl I’ve heard of in the state over the past few years. Photographing it was a high priority on my list. And I certainly didn’t want to cause it undue stress by using flash photography. In cases like this, shooting in very low light may be the only alternative you have.
Let’s explore some of the factors of shooting in low light and look at some things we can do to help us capture a great image in low light:
Camera Sensor
Shooting in low light conditions is influenced by our camera’s sensor. Simply put, the better the sensor, the better the quality of image in low light. With lesser quality sensors, there will typically be more noise in the image. As we will see, there are some things we can do to help our sensor capture a higher quality image.
Shoot to the Right
Shooting an image so that the histogram is well to the right of the box (as seen on the camera’s LCD screen) is a technique that will help to minimize noise in our image. To do this, we will want to first grab a “test shot” and check the histogram on the back of our camera (Note: if you are not used to using histograms, please consult your camera manual to find out how to set it so that the histogram will automatically display immediately after your image is made).
When reviewing our test image’s histogram, if the histogram’s right edge is not close to the righthand edge of the box, then we will need to add more light to our capture. The best way to do this is by using our Exposure Compensation feature of our camera. Add some exposure (maybe up to +1 EV), make another test shot and check its histogram. Continue this process until the histogram’s righthand edge is near the righthand side of the box. Now, you are ready to make your best capture in low light.
Aperture Setting
When shooting wildlife in low light conditions, always set your Aperture setting to the largest opening you can (i.e. the smallest f/stop number). This will allow the maximum amount of light into the camera, allowing you to shoot at the fastest shutter speed.
Select a High ISO

Shoot, Shoot, Shoot
When shooting in low light, always shoot a lot of images. You’ll find that often you will have some blurry images due to subject movement or camera shake. The more you shoot, the more likely you will get at least one image that is relatively sharp.
Understand the Subject’s Actions and Behavior
When preparing to shoot wildlife in low light conditions, always do your research first and determine if the desired action you’re trying to capture might be captured at other times of the day, in better light. Often this is not the case, but sometimes you might find that the same behavior can be captured during the low evening light, instead of the low morning light, and perhaps the angle of light falling might be better at one extreme, over the other.
Noise Reduction
As mentioned in this article, shooting in low light tends to yield images with some amount of noise in them. There are several standalone programs that can be useful for removing noise, in addition to Adobe Lightroom and Adobe Photoshop. If you shoot a lot in low light conditions, learn noise reduction techniques from one of these programs.
Don’t Give Up!
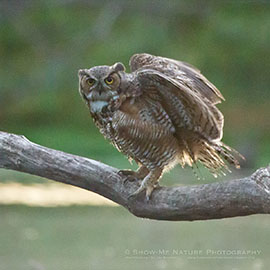
Like most things in life, some things take many tries before we succeed. Such is the case with the owl images in this post. Go for it, shoot lots of images, and best wishes for a great capture!
Get more great tips in our free weekly newsletter.
 About the Author: Jim Braswell is a lifelong resident of Missouri, photographing nature in Missouri and beyond. His photographic passion is wildlife and wildflowers. When working with wildlife, his goal is to capture animal behaviors and actions. Besides photographing nature, Jim teaches photography and Photoshop at a local career center and participates in several art fairs/festivals every year. View more of his work on his website at: http://www.showmenaturephotography.com/
I was searching the web to find out information on how to take photographs of birds on my bird feeder in my back yard in low light. I found your web page. I will use your tips. I have a GE X450 DSLR camera. I hope one day I can buy a more expensive camera. Thanks for your information.