When photographing a subject, do you picture in your mind just how that photo will be used? Do you ever consider multiple uses? I got caught in the trap of shooting for a single use, early in my photographic endeavors.
When putting together a series of images for a nature calendar, I found some older images that would have been wonderful to include in the calendar. But these images were all shot as verticals (or, “portraits”) and were not able to be cropped to a suitable horizontal format. In some cases, you may be able to re-crop a vertical into a horizontal, but sometimes the result is not what you are looking for. In this post, I’ll share a few things I learned along the way and how I try to shoot all my nature subjects today.
Shoot Vertical or Horizontal?
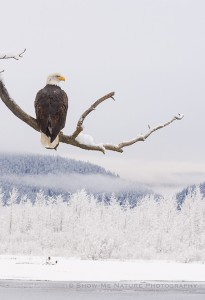
When I first come upon a subject I’d like to capture, I usually look at the subject and try to determine how the subject would best look; should this be a vertical (also called “portrait”), or should it be a horizontal (also called “landscape”)?
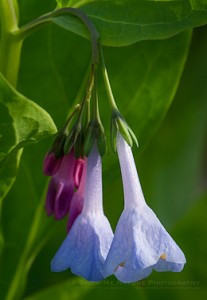
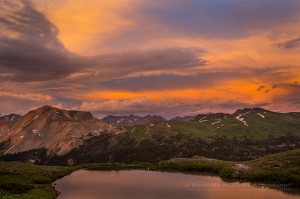
Often, a subject lends itself to shooting one way over the other. As an example, if I’m shooting a tall wildflower or tree, my preference is to shoot it vertically. This helps to enhance that aspect of the subject. And if I’m shooting a tall mountain, I may choose to either shoot it vertically, especially if I’m trying to lead the viewer through the image to the tall peak, or I may choose to shoot it horizontally (e.g., more of a wide angle view) if I want the viewer to see the entire scene, including other peaks. Sometimes there may be a clear decision to shoot either a vertical or a horizontal, but many times either composition will work.

After I determine the “best” camera orientation (vertical or horizontal), I will work the subject as much as I can, making many images while varying the composition slightly. But when I’ve exhausted my photographic eye, I will change the camera orientation and shoot some more. By doing this, I will have both orientations available, for multiple uses, at a later date.
How Tight Should I Shoot?
Another consideration you should think about is how “tight” you shoot the subject. Do you shoot a close-up image, or do you shoot a wide composition? Again, I like to shoot a little of both to give me more flexibility when a new use for that image comes up. Also, if you have many megapixels in your camera, you may be able to crop a bit more for additional uses. But if your camera megapixel count is on the low end, your ability to make larger crops (while still retaining a high resolution) will be affected. In this instance, shooting with varied focal lengths will give you maximum flexibility.
Specific Uses
If you have a specific use in mind for an image, always shoot for that intended use. For example, if you think a scene would work nice for a magazine cover, you will need to shoot it vertically (all magazines I’m aware of, are vertically composed). But you will also need some room at the top of the image (for the magazine’s name), as well as some room to one/both sides, for the magazine to list articles in the issue. After shooting for this intended use, vary the orientation and focal length and shoot some more.

Other potential uses that you might want to consider are: calendars, note cards, Christmas/Holiday cards, fine art prints, and even screen savers for your computer.
As I mentioned early in this post, you may not be aware of potential uses for an image until farther down the road, when it’s too late to re-shoot the subject. So shoot a lot, and vary the orientation, focal length and composition to maximize the potential uses for your images.
Do you have any suggestions to add? If so, let us know.
Get more great tips in our free weekly newsletter.
 About the Author: Jim Braswell is a lifelong resident of Missouri, photographing nature in Missouri and beyond. His photographic passion is wildlife and wildflowers. When working with wildlife, his goal is to capture animal behaviors and actions. Besides photographing nature, Jim teaches photography and Photoshop at a local career center and participates in several art fairs/festivals every year. View more of his work on his website at: http://www.showmenaturephotography.com/

I agree with you, shoot lots, it is easy witth digital, but even now I find myself slipping back into the old film camera habits, to name just one, neglecting to read and digest the info especially the histogram
Thanks for your comments, John! I totally agree. New technology is nice … and fun. But we still have to be vigilant in our good habits we’ve developed :o)
Good article! I love delving into this obsession…..when I approach a shot, I tend to think about how it would look good horizontal, then vertical, then shoot both. The full-frame and not, then above, level, and below angles. Then I make additional copies, setting up black & white, different crops, etc.