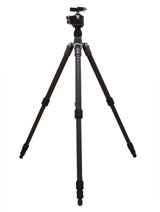
 Tripods are one of the most important tools of nature photography. Not only do they help you get sharper images, but they also have a tendency to force you to consider your composition more carefully.
And, although they may seem like really simple pieces of equipment (especially when compared to your camera), there’s actually a few things you should keep in mind when using them in order to maximize their effectiveness:
#1 – Keep the center post vertical and perpendicular to the ground
The most important thing about setting up your tripod is to ensure that the weight of your camera is evenly distributed between the three legs of the tripod. One way to make sure this is the case is to set it up so the center post is vertical and perpendicular to the ground. A bubble level will really help in this situation.
#2 – Avoid extending the center post
I know it can be very tempting to use the center post on your tripod to slightly raise your camera, but you should generally avoid using that center post unless you really need to. You should first extend the legs if possible, since the three legs will support your camera much better than an extended center post (especially if there’s any wind).
#3 – Use L-brackets and tripod collars
I’ve talked about L-brackets and tripod collars in a previous post, but it’s always good to reiterate their importance. These accessories for your lenses and tripod heads will greatly help keep your camera more stable on your tripod.
Since each lens has a different weight, they can all affect the balance of your camera, so these L-brackets and tripod collars are meant to correct that.
#4 – Hang a camera bag from the center post for extra stability
As nature photographers, we typically like to carry lightweight tripods. However, these lightweight tripods are a lot less stable in windy conditions, so one thing you can do is hang your camera bag (or other heavy object) from the center post of your tripod to help weigh it down some more.
If your center post doesn’t have a hook, then check out the manufacturer’s website because I’ve noticed a few tripod makers have this hook as an extra accessory. Another thing you can do is install a hook yourself from a hardware store, as long as the bottom of your center post is made of plastic.
A few words from Ansel Adams…
Whenever I feel lazy about taking the time to set up my tripod carefully, I always remember these great words from Ansel Adams:
“Many photographers casually set up the tripod and use the various tilts and adjustments in a haphazard way. It is preferable, however, to be more methodical in setting up the tripod, if time and situation permit, to provide precise positioning of the camera and the greatest possible stability.” –Ansel Adams
What did I miss?
Is there anything else that you do to ensure your tripod is as stable as possible? If so, please share with us by leaving a comment below. Thanks! 🙂
Get more great tips in our free weekly newsletter.
 About the Author: Steve Berardi is a naturalist, photographer, software engineer, and founder of PhotoNaturalist. You can usually find him hiking in the beautiful mountains and deserts of southern California.

Fantastic Post Steve! Well said and great points. Those are definitely key elements to tripod stability.
I have something to add and one thing that builds upon one of your points.
Tripod Maintenance – Always keep your tripod tight.
Before heading out, check your tripod joints, leg locks, gears, head, etc. for anything loose. Tighten as needed every 2-3 uses. Most manufacturers provide an allen wrench, multi-tool, etc. for keeping everything nice and tight. There is nothing worse than being on-location and one of your legs becomes loose. Trust me.
An Add-on to Your Points Regarding Center of Gravity and Stability:
If you tripod has features like low-angle legs or a multi-function (boom-style) center column, those are also useful in keeping that center of gravity leveled — especially in odd shooting locations (rocky slopes, steep terrain or even just dramatic urban landscaping.) Spread the tripod legs out low, adjust the height of individual legs to balance the weight on the terrain and use the boom arm (if equipped) to shoot on sloping substrates for that extra reach to balance that center out, if needed.
All excellent points for deliberate photography. One additional point that should be added to take full advantage of a tripod, a remote release. Pushing the shutter may cause unwanted motion whereas a remote (cable release in the old days) will eliminate that problem. One could always use the self-timer as an alternative to a remote release. Another tip would be to use the mirror lock-up feature if available on you camera. That too would reduce any vibration that may compromise an image.
Thank you for this article. I often read that deactivating the lens stabilization feature is also a good thing to do, so I would probably add that to the list.