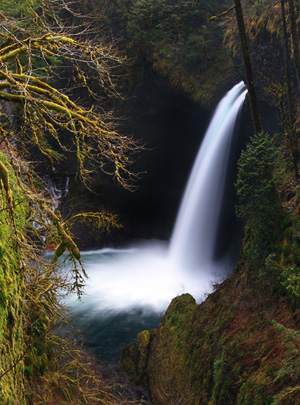
So, naturally, waterfalls are also a popular subject to photograph! Here are a few tips for capturing them:
#1- Use a slow shutter speed
The slow shutter speed will help blur the water and give it that “silky” look that helps show motion in the water. Usually, a shutter speed of a few seconds works well, but this varies depending on the speed of the water flow (slower water needs a slower shutter). To help you get a slower shutter speed, try using the lowest ISO setting and a high f-number (but not the highest on your lens, because lenses usually start losing a lot of sharpness there).
#2 – Use a polarizing filter
The polarizing filter helps you in two very important ways: it reduces or eliminates reflections in the water and on the wet rocks, and it helps you get a slower shutter speed (between one and two stops).
#3 – Use a tripod
With such a slow shutter speed, it’s essential that you use a tripod. Otherwise, you’ll end up with a super blurry photo. When setting up your tripod, avoid using that center vertical column because it severely reduces the tripod’s stability.
#4 – Take two exposures: one for the water and one for everything else
One of the most common problems you’ll encounter with photographing waterfalls is overexposed spots in the water of your image. These often occur even when the surrounding landscape is still underexposed. So, try taking two exposures: one for the water and one for the surrounding landscape. The water should be close to white in one exposure, and should be overexposed in the other. You can combine these two exposures later in Photoshop, using layer masks.
#5 – Photograph the waterfall at the right time of the year
The water source of the falls will determine how much water flow there is, so it’s important to consider the waterfall’s source. For example, if the waterfall is primarily fed by snowmelt, then your best bet is to visit it in the spring or summer. There’s a subtle balance here though: you don’t necessarily always want to visit the falls when it has the strongest water flow, but instead you want to visit it when it has the perfect water flow for the composition you envisioned.
#6 – Keep an eye on the wind
With a slow shutter speed, it’s important to pay close attention to any movement in your scene because a tree branch that’s waving in the wind will end up a blurry mess in your final image. If it’s super windy out, you may want to use a smaller f-number and higher ISO for the waterfall’s surrounding landscape, while using a slow shutter for the water itself (see tip #4).
#7 – Photograph the waterfall at sunrise, sunset, or an overcast day
One of the most important things to a successful waterfall photo is balanced light: everything in the scene should be evenly lit. Since most waterfalls are under the shade of a forest, shooting them at midday will usually mean a bunch of harsh shadows and a few bright highlights (an exposure disaster!).
So, the best time to photograph a waterfall is at sunrise, sunset, or on an overcast day. Sunrises are probably best because you’ll usually have the waterfall all to yourself, and won’t have to wait for people to get out of the way of your scene 🙂
For more tips, check out my other tutorial
For more of a complete step-by-step guide to photographing waterfalls, check out this tutorial I wrote for Phototuts+ last year.
If you enjoyed this article, and would like to read more, please signup for free updates by email or RSS.

 About the Author: Steve Berardi is a naturalist, photographer, computer scientist, and founder of PhotoNaturalist. You can usually find him hiking in the beautiful mountains and deserts of Southern California.
Thank you for taking your time and sharing your knowledge. I love your tips and I love your photos. I was introduced to your website from your father when I worked on a project with his company. I’m a hobbyist trying to learn photography so if you have a chance if you could critique my work that would be awesome.
Of course you have to keep safety and accessibility in mind, but I think waterfall shots are much nicer close as possible with a wide angle lens. Even if you shoot the exact same crop and angle, a shot with a telephoto will be less dramatic because it tends to flatten things out, while a wide angle adds a sense of drama.
Also for me, each waterfall has a different personality, a different feeling. Unless access is controlled, spend some time walking around it and getting a feel for the personality before you start – this will help guide your camera settings eg. frozen at 1/500th for a thundering waterfall, or 5 seconds for a peaceful cascade.
I always just plan on coming home with wet socks when I go for a waterfall – that means a change of socks and shoes in the car, make sure your mobile, car keys and wallet are secure and wade on in!
Nice tips – a tripod is essential although they are a pain to lug around and use.
In terms of sunrise/sunset I think it’s important to do your research and determine which direction your waterfall is facing. Showing up at the wrong time of day may give you some really unexpected lighting. Overcast days are still my favourite to be out not only because of the ideal conditions for shooting but also because everyone else tends to stay indoors!
A pretty nice list of things to remember!