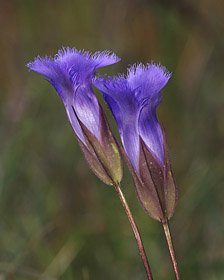
For example, one day earlier this fall, I set out to photograph one of my favorite fall wildflowers: the Fringed Gentian (Gentiana crinita). They’re generally found in open areas next to higher quality wetlands, and usually grow in clumps of a hundred or more flowering plants.
Photographing them can be challenging since their habit of growing in clumps can make it hard to isolate one or a few of them in an image. Nevertheless, the Fringed Gentian is a beautifully delicate wildflower that deserves the very best attention in depicting that very beauty and fragility.
The first location I chose had numerous plants: well over a hundred. I tried taking a few photos of grouped flowers, but didn’t get the image I was looking for:
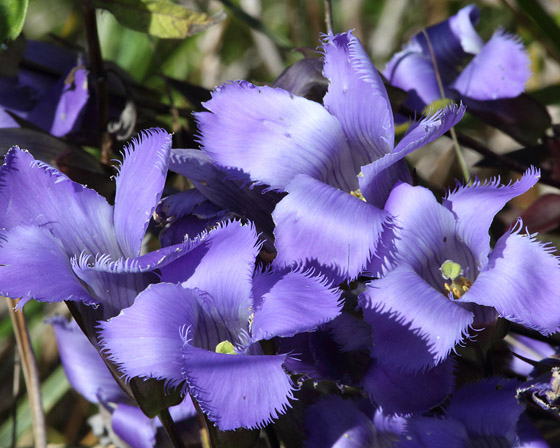
This photo is a typical point-and-shoot shot: properly exposed and acceptable sharpness given the limitations on depth-of-field. However, the lighting and composition are questionable. Your eye wanders around from flower to flower trying to get some meaning to the photo. And, the high contrast from the direct sunlight adds harshness where harshness is not characteristic of such a lovely wildflower.
So, next I tried to find an isolated flower with a good background. This was also tough, as you can see in this photo:
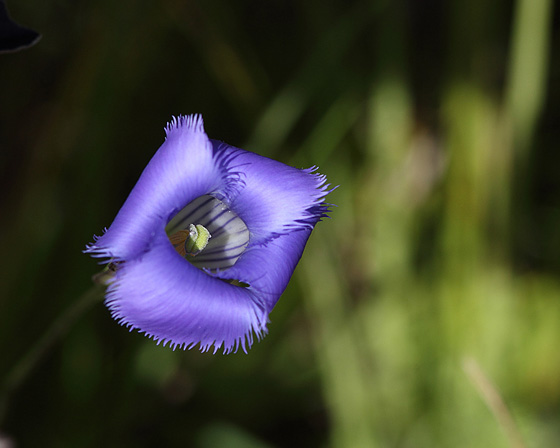
This photo follows some of the guidelines of composition and is properly exposed with good sharpness. But, it still lacks intensity and only hints at the beauty of the flower.
Next, I tried a completely different angle, but with the same lighting conditions. I wanted to find the same isolated look and came across a suitable pair of gentians along the trail. I decided to try and photograph this pair straight on, but they were only about 10 inches tall, so I needed to remove the center post on my tripod to get it very low to the ground.
My first attempt produced this photograph:
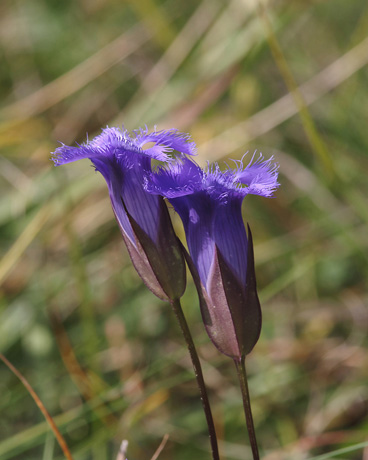
This shot was taken with my Canon 60D, Canon 300mm f/4 lens with a 12.5mm extension tube, and shot at ISO 200, f/11, 1/100 second.
But, this photo has a distracting background, and too much direct sunlight.
So, I decided to move in a little closer (about a foot or so), to decrease depth of field and get that background a little more out of focus. I used my camera’s depth of field preview button to help determine when I got close enough.
To battle the direct sunlight, I decided to try and add some light by using my Canon 580EX flash unit with a soft box attached to diffuse the harsh flash lighting. I set my flash to a minus 3 EV.
Here’s the photo I got after making these two changes:
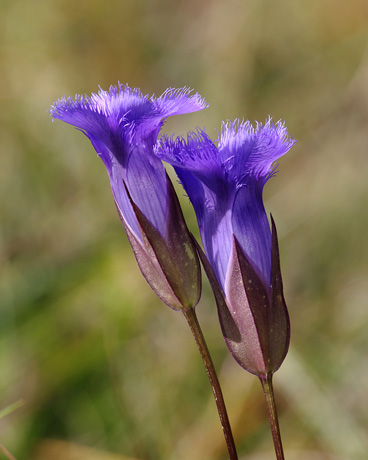
This photo shows a much better background along with subtle lighting of the underneath parts of the flower. But, I still wasn’t satisfied with the result. After spending close to five hours photographing this species of flower, I still did not capture the delicacy and beauty these flowers hold in my mind.
As I was thinking of what to do next with the available circumstances and the minimal amount of equipment I carried into the field, I noticed that some very scattered thick cumulus clouds were moving in overhead. Typically, cloud cover creates great lighting for flower photography, but these clouds were thick and blocked out most of the sunlight which would require longer shutter speeds and wouldn’t allow me to use the smaller aperture I needed for depth-of-field. There was also a slight breeze and so I had to wait for that precise moment when the flowers would not wave back and forth to allow for my 1/100 second shutter speed.
What I decided to do was try a shot with my flash at minus 1 EV the moment one of these clouds passed over the flower, darkening almost everything. I fired the shot, looked in my viewfinder and finally saw the image I was trying to get all day!
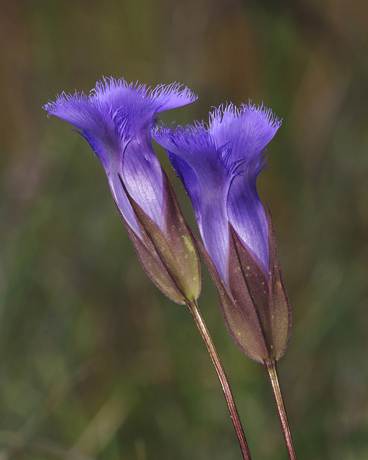
So, the lesson here is: sometimes it takes some experimenting to get that image you’re looking for. You might start with something basic, but then as you continually make small adjustments, the image will eventually evolve into your original vision.
If you enjoyed this article, and would like to read more, please signup for free updates by email or RSS.
 About the Author: Vic Berardi is a raptor lover that lives in the Midwest. He is the founder of the Illinois Beach State Park Hawk Watch and every weekend of the year you’ll find him searching for hawks and photographing them. Several of his photographs have been published in a leading raptor journal and in articles he has written. During the year he gives presentations teaching others about hawks and hawk migration. Vic also photographs dragonflies and wild flowers and is always respectful of nature and its creatures.

Applaud your patience and strive for excellence in creating this nice image! =)
Awesome explanation of the process……..i loved it.
Any beginner can easily understand the way you have explained.
Keep going……
A great lesson! Your final image is beautiful and showcases the lovely structure of the flower!
Super Super article and lesson. Thank you.
That was one of the best reads, and looks, I’ve seen in a while. Loved the finished image. Wish I had your patience.
Great article and most instructive. One tiny suggestion; would it be technically possible in this sort of tutorial to put those final three images side by side to make comparisons easier ? Scrolling up, and back, and up, and back , it is harder to hold an accurate visual memory of the finer points. For me at least. Thanks Vic.
It’s so nice to read that even the pros take numerous unsatisfactory shots while trying to find the perfect one. Great article and explanations. Thanks!
Really impressed by your persererence & demand for perfection. Also reassured that a professional photographer is faced by the same flower shooting conditions that I, as an amateur (& relative beginner) is faced with.
You’ve explained your proces in achieving that great shot extremely well, so that we ‘beginners’ can most benefit.
Thankyou very much.
Thank you everyone for the kind remarks & comments! One thing I’ve learned most about nature photography is patience and the satisfaction that follows.
@ Colin, good suggestion, hopefully this link will help:
http://i546.photobucket.com/albums/hh432/VBirdman/PNEvolution3LastPics.jpg
I just noticed that clicking on the link I made for Colin sends you out of PhotoNaturalist, sorry about that 🙂
Thanks Vic – makes all the difference having the three of them side by side
Really enjoyed the article and learned from it. Especially it was a good lesson for me to know that evolution to the final image can be quite long but worth and satisfying.
Thank you very much Vik.
Hi Vic,
I really enjoy your articles introducing a specific activity and how you go about it. A true teacher. You mentioned that you used your flash with a “soft box”. Could you elaborate on the soft box item please? I would like to incorporate that in with my nature photo taking. I live right outside the Big Bend National Park and during the rest of the year when the showy blooms of the cacti are long past there are so many fantastic miniscule blooms that go unnoticed here in the desert. I think that would help with the often harsh sunlight here in the desert.
Thank you.
Charlton
@ Vytautus, thank you, glad you enjoyed it!
@ Charlton, thanks! There are various products on the market and I have tried a few. Sometimes I use a combination of two diffusers/soft boxes (if they can fit inside one another.)
Not knowing what flash unit you have all I can say is to try something like this one (just make sure it will fit yours):
http://www.bhphotovideo.com/c/product/732852-REG/Impact_Universal_Bounce_Mini.html
Here’s a link to more soft boxes:
http://www.bhphotovideo.com/c/search?&ci=655&N=4288586347
Hope this helps!
I appreciate you taking to time to contribute That’s very hlefpul.
Dear Vic,
Hats off to your patience and perfection. The things are to be learnt by a photographer like me to have a best photograph. Thanks for the nice article.
Thank you dilip naik, I just wish I had more time to write articles, especially when I read nice things like this 🙂
Perfectly lovely.