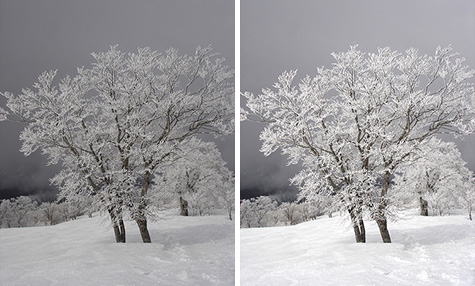
Yesterday, I wrote a few tips for getting a perfect exposure of a snow covered landscape (or, how to avoid the “gray snow problem”).
But, what do you do with all those gray snow photos you already took? Throw them away?
Nope! Fortunately, there’s an easy way to fix the gray snow problem in Photoshop. With just a few clicks, you’ll transform that dull grayness into a beautiful bed of white textured snow.
Here’s how to do it:
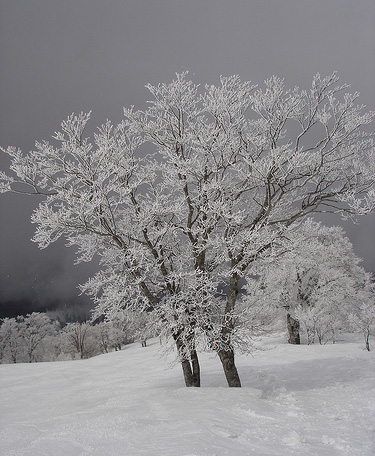
Starting with this photo…
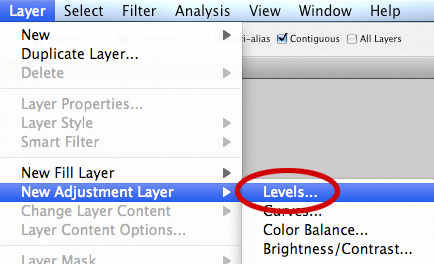
1) Add a new levels adjustment layer, by going to the “Layer” menu, then the “New Adjustment Layer” submenu, and finally select “Levels…”
2) Name the layer if you’d like, and hit “OK.”
3) Click on the “white eyedropper” button (circled in the screenshot below):
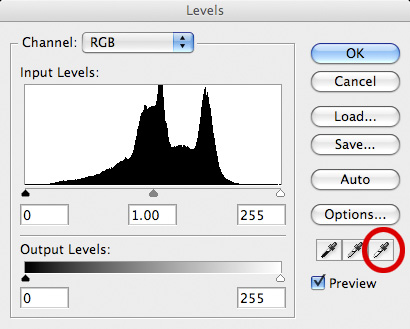
4) Here’s the part where you’ll have to do some experimenting. While keeping this window open, click on a part of the photo that you think represents the brightest white (anywhere on the snow should be a good first guess).
5) You might now see some blown out highlights, like this:
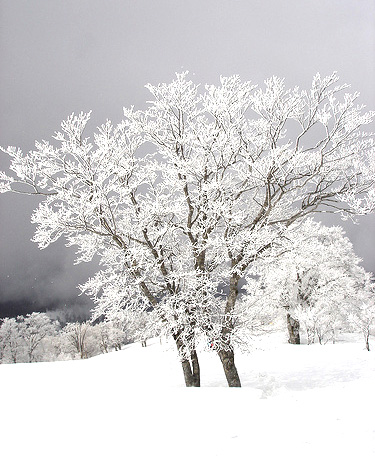
6) To get rid of those blown out highlights, just keep clicking around the photo (but only click on parts you think should be white), until you get a photo with just a few sections of blown highlights (they’ll look like bright white circles or blobs).
7) Keep clicking with the eyedropper towards the center of these circles/blobs, until it’s gone, and you’re left with a nice textured bed of snow, like the one here:
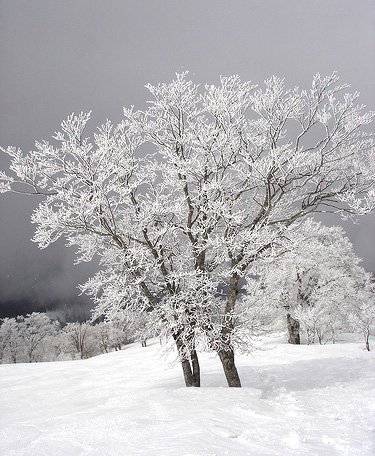
You may also want to zoom in on the photo before adding the adjustment layer, to ensure you don’t create any subtle blown out highlights.
Only use this method as a last resort!
With the wonderful power of tools like Photoshop, it’s tempting to get lazy out in the field (not thinking about exposure) and just say to yourself “eh, I’ll fix it in photoshop later.” Always remember that any post processing you do in Photoshop (or any other program) will significantly add noise to your photo.
If you enjoyed this article, and would like to read more, please signup for free updates by email or RSS.
The photograph used in this article was taken by kelpenhagen and is used under the Creative Commons Attribution-Noncommercial 2.0 license.
 About the Author: Steve Berardi is a naturalist, photographer, computer scientist, and founder of PhotoNaturalist. You can usually find him hiking in the beautiful mountains and deserts of Southern California.
This is just a shot in the dark, but I wonder if some High Dynamic Range processing might not be a good application here. I know when I shoot snow with a bright blue sky, I often either get a blown out sky or dark snow. Maybe if there’s a way to use HDR software to combine images of both exposures, you can get a resulting image that resembles a better balance of exposure that you can’t get otherwise.
Then again, I’ve never messed around with HDR, so I don’t know.
Perfect timing Steve ! Right now I’m 30 miles East of Buffalo, NY and this will help !
Fantastic tips – and again, perfect timing!
Wonderful article, thank you again !