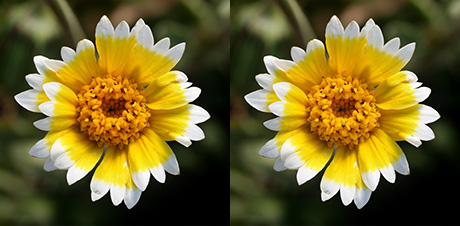
There are times, however, when that perfect exposure doesn’t exist. We’ve already explained how to fix blown-out highlights, but what if your flower photo suffers from shadows or underexposed areas?
You may think of taking two exposures in this case, but flowers bounce so much through the air that aligning these two exposures later will not be fun.
Fortunately, there’s a simple way to fix these underexposed areas of your photos, using Photoshop. Here’s how:
We’ll use the photo below as an example. This photo of a Tidy Tip is underexposed a little bit in the center (it should be a brighter yellow):
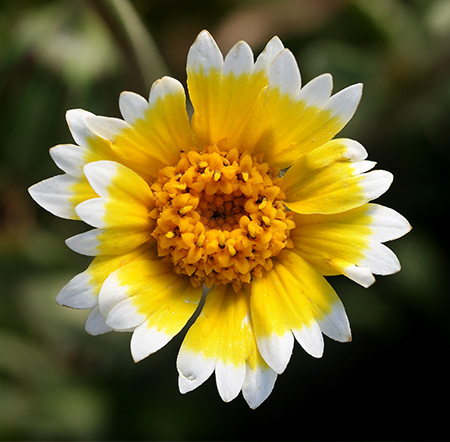
We’ll fix this by using a Levels adjustment layer with a mask. So, let’s start clicking!
1) Use the “Elliptical Marquee” tool to circle your underexposed area (which usually occurs in the center of flowers). If your area isn’t circular, then you’ll need to use the lasso tool to outline it.
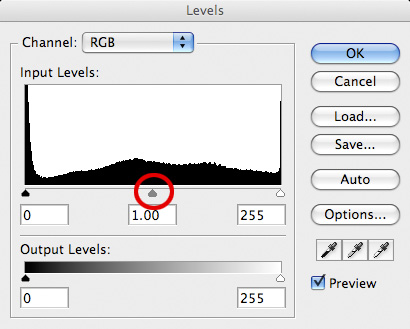
2) Add a new “Levels Adjustment Layer” by going to the Layer menu, then selecting New Adjustment Layer and finally “Levels”
3) Make your selection lighter by dragging the center triangle towards the left (see red circle in screenshot below). The more you drag this triangle to the left, the lighter your selection will get. Stop when you’re satisfied, and click “OK” (alternatively, you may have to drag the rightmost triangle to the left instead of the center one, so try both!)
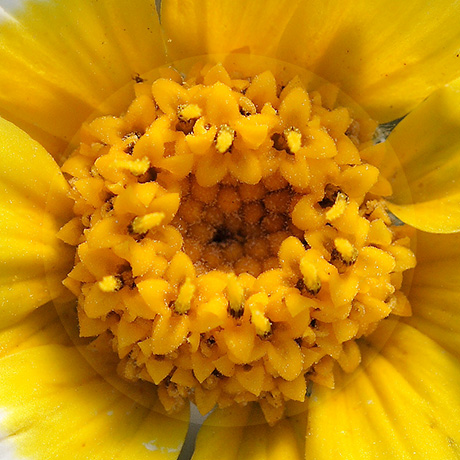
4) Your underexposed area should now be properly exposed, but there’s probably a sharp outline between this area and the rest of your flower (see below photo). To get rid of this, go to the Filter menu and select Gaussian Blur under the Blur submenu. Start at 0 pixels and keep increasing the value until that sharp edge is gone and the area merges smoothly with the rest of your wildflower.
And, here’s the final result:
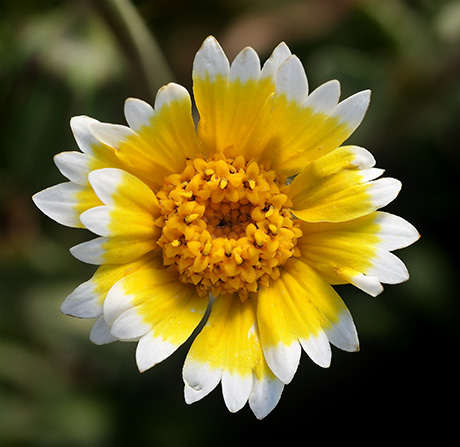
You may have noticed this is almost the complete opposite procedure that was in our eBook, “How to darken a background in Photoshop” 🙂
If you enjoyed this article, and would like to read more, please signup for free updates by email or RSS.
 About the Author: Steve Berardi is a naturalist, photographer, computer scientist, and founder of PhotoNaturalist. You can usually find him hiking in the San Gabriel Mountains or the Mojave Desert, both located in the beautiful state of California.
Have you tried feathering the selection? Feather amount can be chosen with the selection tool, or it can be chosen after. Go to Select –> Feather and choose the amount. This should reduce the need to use Gaussian Blur.
Thanks so much for the tips, I hadn’t even thought of trying to brighten up the shadows on some of my wildflowers. Many of them need it since I have never used any kind of light filter box over them, yet.
Great tip, Steve. I’m adding this to my bag of tricks and will try it out on a few shots I’ve taken recently. Thanks again!
@mmatmRed – I’ve tried the feathering too, but prefer using the gaussian blur mainly because it shows you an immediate preview of the effect, whereas with the feather you have to guess and hit OK to see the effect (possibly resulting in a lot of undos).
@Joe – No problem, I hope it works well on your shots!
mindblowing… I cant stop thanking you…
It’s Great . .really . . thnksssssss
Very cool. Thanks!