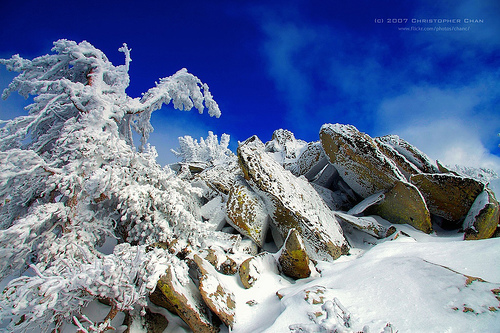
Have you ever tried taking photos of a beautiful winter landscape covered in bright white snow? And, did the snow in all your photos end up looking gray, instead of that beautiful white?
The “gray snow problem” is very common, and happens because your camera’s light meter sees everything as neutral gray. When it looks at the bright white snow, it just thinks you’re trying to photograph a gray subject in brighter light, so it underexposes your shot.
Fortunately, there are three easy ways to avoid this problem:
Exposure compensation
The easiest way to get a proper exposure for your snow photos is to use exposure compensation. If you’re in aperture priority mode, you should have an option to increase or decrease the camera’s recommended exposure.
Usually, setting the exposure compensation between +1 and +2 will give you a good exposure for snow covered scenes.
Use a gray card
If you want a truly perfect exposure of that beautiful winter landscape, your best bet is to use an 18% gray card. Here’s how to use them:
- Switch to aperture priority mode, so you get an automatic exposure
- Hold the gray card in front of your lens, so the gray covers the entire frame (make sure the light on the card is just like the light on your subject)
- Snap a photo, and take note of the exposure
- Switch to full manual mode, and use the exposure from above (even though your camera will say it’s too high)
- Compose your snowy landscape, and press the shutter!
Expose off the sky
If you’re taking the photo when there’s a blue sky, then you can just get a meter reading off the sky, and use that exposure for the snow covered scene. To do this, make sure you turn on “spot metering” when getting a reading off the sky.
This type of metering isn’t available in most lower end cameras, but they have something that’s almost just as good: partial metering.
If you really want to master exposure…
Then check out Bryan Peterson’s excellent book, Understanding Exposure. It was originally written for 35mm cameras, but was recently updated for digital.
The photograph at the beginning of this article was taken by Christopher Chan, and is used under the Creative Commons (by-nc-nd) 2.0 license.
If you enjoyed this article, and would like to read more, please signup for free updates by email or RSS.
 About the Author: Steve Berardi is a naturalist, photographer, computer scientist, and founder of PhotoNaturalist. You can usually find him hiking in the beautiful mountains and deserts of Southern California.
As always, great tips. A blown out sky is always a problem for me although I haven’t tried this technique with snow on the ground.
I live in the Sierra foothills near Chico, CA. so finding snow shouldn’t be much of a problem. 🙂
I wish I’d read this article before our snow last week. We got 4 inches — unusual for middle Alabama. I took over 300 photos but wasn’t real happy with they way the snow looked.
Thank you for this. I’ll be ready next time!
I use PSE. I tried correction with the “Remove Color Cast” I’ll give your suggestions for correction a try and see if the highlights won’t be blown out so much.
Sylvia
Understanding Exposure is a great book. I always use it as a reference when it comes to metering. Thanks!
Thanks for the blog post! I was thinking about heading off to Lake Tahoe sometime, but I have no idea how to take photos in snow covered grounds. My old photos are always grey and looks bad. Thanks for the tips!
Love your article, thank you so much for all you do.
I have found a great tool.. No, this is not my creation.. but I bought one and love it…I think better than a grey card.
It is called an expo disk. You simply put it over your lens, point your camera at the available light, not directly at the sun, take a photo then set your White Balance to that photo.
This will set your white balance perfectly in just about any situation.
http://www.expoimaging.com/product-overview.php?cat_id=1
It costs $100.00 bucks though.. but for me it is worth it!