There seems to be a lot of debate about the best sharpening method in Photoshop. Some say it’s “unsharp mask,” while others swear by “smart sharpen,” and a few have developed complex multi-step workflows for sharpening their photos.
I’ve tried a few of these techniques, but the one I like best is High-Pass sharpening. It’s my favorite method for two reasons:
- It barely adds any noise to your photo
- It’s a short and quick process
So, here’s how you do it:
1.) You’ll need to have a flat image for this, so if you have multiple layers, merge them together by selecting “Flatten Image” from the “Layer” menu.
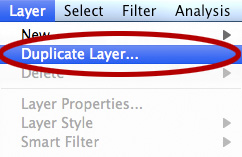
2.) Create a duplicate layer of your flat image by selecting “Duplicate Layer…” from the “Layer” menu:
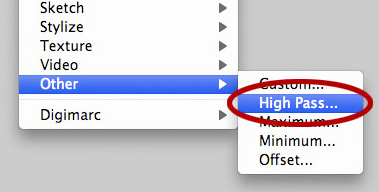
3.) Go to the “Filter” menu, and go all the way to the bottom until you get to the submenu labeled “Other,” and then click on “High Pass…”

4.) You should now see a window that looks like this:
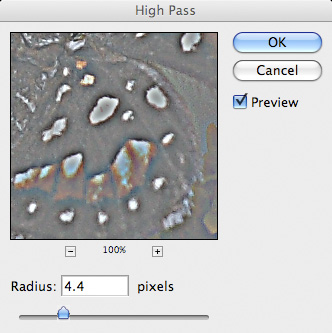
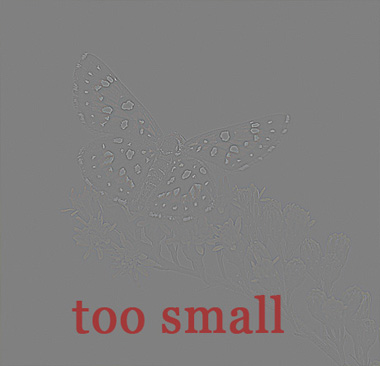
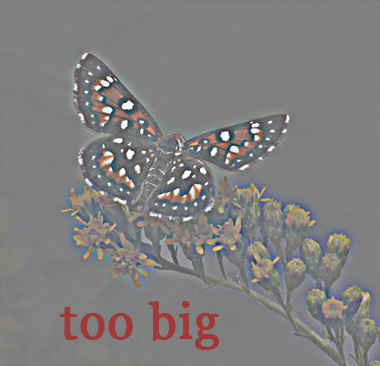
5.) The goal here is to select a pixel radius large enough so it outlines the edges of your photograph and shows a little bit of color (make sure the “preview” box is checked!). Usually values between 4 and 10 work very well. Here are a few examples of radius values that are too small, too big, and perfect:

6.) Click “OK” to apply the filter
7.) In the “Layers” window, click on the blending mode listbox, and select “Overlay”
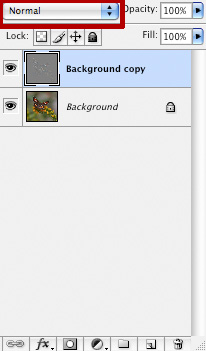
8.) Your photo should now look like it’s too sharp. But, don’t worry, the next step is to fix that! Right next to the blending mode listbox, there’s an “Opacity” slider. Click on that and lower the opacity until your photo looks sharp, but not too sharp. I usually set it between 30-45%.
You should now have a super sharp photo! Here’s an example before/after:
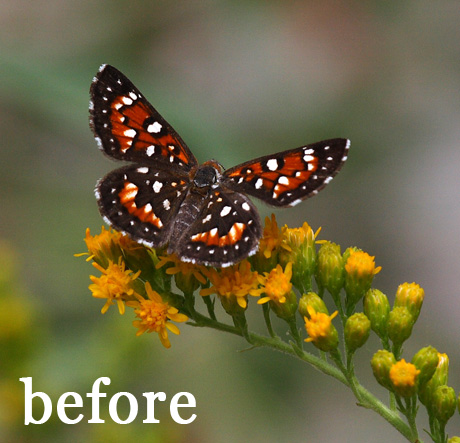
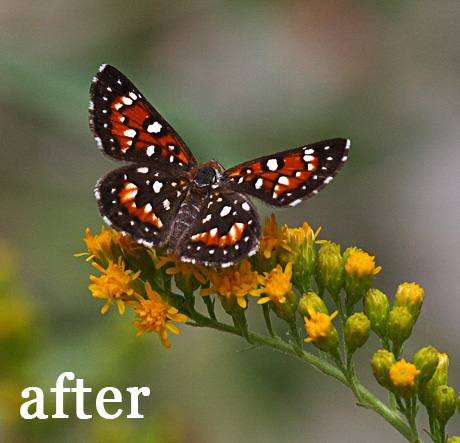
Click here to open a side-by-side comparison. It’s a lot easier to see the difference if you do an undo/redo in Photoshop.
Hey Steve,
This is a great tip and explained very well, thanks!
steve
you have a great website! Very informative. I have used high pass sharpening for a while now but never utilized opacity to reduce the effect of over sharpening! Simple! Great tip!
You are bookmarked!!!
Thank you
alan
After the last step, I somehow get the rectangular marque bar, what am I doing wrong?
I have been looking for quite some time now on how to get your lmages sharp in Photoshop. I attend a digital art group for therapeutic purposes and the lad has got us using the pen tool to create perfect edges. To be quite honest its a little complicated and very time consuming but it does create a perfect edge.
Your Sincerely Mr Anthony Cotton
Thanks, it’s quite easy and results look better than after special plugins!
This is also the method I use, however instead of changing the layer to “Overlay”, I use “Soft light” and really does great things for portrait sharpening. Just a suggestion — play around with it!
You can actually achieve exactly the same results with the High pass method or with the Unsharp mask method , playing with the 3 values in the unsharp mask filter !
To convince you, try both methods in different layers and use the ‘difference’ blending mode on the top layer, you will see that there is no difference at all !!
Thank you so much! Takes a great photo and makes it ten times better. Exactly what I needed. 🙂
Great article – very helpful. Have you used Nik’s Sharpner Pro? I might do some tests and see the difference between your model and the Nik one… Your web site is super by the way
First of, Steve, let me say how much I enjoy your site and you don’t know how much I’ve learned from reading your articles!
I am an avid user of this method of sharpening. Another variation I use is to apply the high pass filter as stated, but instead of setting the blending mode to “overlay,” I often set it to “linear light.” Try it.
I was using the unsharp mask all the time and wasn’t satisfied! This is so much better!!!
Steve, You have given me a relief with simple solution. Thanks a ton.
This did work well for myself.. I had never tried this method prior to today and I do like this better than what I was using prior and the changes to the image quality and or change in grain is not effected as near as how I use to do this. Thanks a million.
Sincerely
simple and very effective tool! thanks!!!
Great tip–I shoot dogs and just tried this on a print that was not very sharp and looks so much better. Compared it other sharpening techniques and I like this one better. Thank you!
You don’t have to flatten the image first. If you just select the top layer, push Shift-Control-Alt-E simultaneously you will generate a new layer that is the merge of all the lower layers. Set the blend mode on the new merged layer to Overlay and then apply the HPF to the new layer. You can then adjust its opacity as above. Hope this helps if you want to keep all of your layers.
I will try it for sure, I do not want my picture to look fake sharpened and this method seems right.
Thanks Mann . .
Got the work done correctly . .
I’ve never tried it and love it, thank you!
Steve:
I went through the same process of choosing which method is THE method and I really parked at the High Pass station because is simpler and provides very good results.
After experimenting a lot, I found out that (for my Nikon lenses and camera) the radius of 4.0 is great. Then, I either choose Overlay (intermediate), Hard Light (intense) or Soft Light (low) as the blending mode according to needs of the current photo. Rarely, I need to apply the Opacity slider as it remains as the last resort.
If I feel that the picture needs an extra sharpening, I re-apply the above method.
Your explanation is great and confirmed my method.
Thanks a lot.
Bressan
THANK YOU SO MUCH! Im familiar with High Pass & was told to put it to Vivid Light….I think on an already failry sharp image its great but when I apply to a blurrier image it looks aweful…to get the pic less blurry you have to apply it stronger & I usually set it it between .3-.7 or its waaay to much but with your technique i was able to put it at 1.1 and i actually didnt lower the opacity…worked solid. Looks 1000% times better. Ill post a before & after on my blog http://ashleydellingerphotography.blogspot.com/
That really helps. Thank you so much, you have no idea how glad I am that I found this. XD
I use this method and then merge visible. Then I convert over to lab color in the Image-> Mode pull down menu. After that I duplicate the layer then use the unsharp mask adjust the opacity on that layer. Then I merge visible again and go back to the image mode it was in previously. Its a good way of making sharp images sharper and also sharpening up blurry photographs, to a certain extent, of course.
As far as what blending mode to use, I use the overlay, but only because I like the way it looks. But it all comes down to personal preference, really.
Thank you so much! Bookmarked!!
Hi Steve, excellent tips. Thanks
Great tips. It’s very easy to follow these procedures, it’s very useful. Now I can make images sharp using this simple technical. Thanks for sharing.
This helped me out so much. Thank you! Great method.
Here’s a couple of extra tips to add to this technique:
1. Desaturate the Highpass layer to prevent enhancing colour noise or colour fringing.
2. If you have a noisy image, run a mild Surface Blur on the Highpass layer so that only strong edges will be retained and sharpened.