Photography is all about making your subject stand out. You want the viewer to easily recognize your subject, and appreciate its beauty. There are lots of ways to draw attention to your subject, but here are a few of my favorites:
Contrast

One of the simplest ways to make your subject stand out is to photograph it in front of a contrasting background. Ideally, you want the colors to be complementary, but any kind of contrast will usually work. For example, in the photo on the right, I really wanted that yellow Desert Sunflower to stand out, so I photographed it in front of some purple flowers (Desert Sand Verbena).
Depth of Field

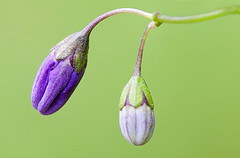
Another simple way to draw attention to your subject is to photograph it in front of an out-of-focus background. The viewer will always look at the sharpest part of the image first, so making your subject tack sharp while the rest of the image is out of focus will help make your subject stand out. The key to getting a nice blurred background is to use a wide aperture (small f-number) and to make sure your subject’s background is far away (at least a few feet).

Scale
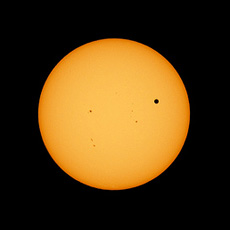
You can also make your subject stand out by emphasizing how big or small it is. Just photograph it with another object that’s much smaller (or larger). For example, the photo on the right really makes the Sun and Venus stand out because of the massive difference in size between the two (note that Venus is actually MUCH smaller than illustrated here, it just looks bigger because it’s closer to Earth).
Isolation

Depth

What did I miss?
If you have another favorite way to make your subject stand out, please tell us about it by leaving a comment below! Thanks 🙂
If you enjoyed this article, and would like to read more, please signup for our free email newsletter.
 About the Author: Steve Berardi is a naturalist, photographer, software engineer, and founder of PhotoNaturalist. You can usually find him hiking in the beautiful mountains and deserts of southern California.

Steve,
Should I use a handheld light meter for landscape shots or will the meter in
the camera gieve the same results? [ Especially for high contrast scenes]
thank you
art
I recently tried changing the metering mode from ‘centre weighted to ‘spot’ and find that – particularly when the main subject is significantly lighter in colour than the background – this makes that contrast between them even greater . The backgtound will be a little underexposed of course. The other way around with a subject darker than it’s background does not work as well, as the background high lights will be blown out distracting attention away from the correctly exposed main subject
Art – It depends on the quality and features of the handheld light meter. But, for landscapes, I’d just recommend using the histogram to find a good exposure.
High contrast scenes will always be a problem, regardless of metering mode, since your camera is limited to a very small dynamic range of contrast that it can capture. If you’re having trouble with capturing high contrast scenes, I’d recommend taking a couple exposures (one for the dark area and one for the bright area), and then merging them later in post processing.
Hope this helps!
Thanks for the suggestions and tips Steve. Always helpful.
I sometimes find doing a slight vignette in post processing can help put additional emphasis on the subject.
Hi Steve,
I am a beginner in photography and am taking this a hobby but seriously as well. Thank you for the very informative and inspiring articles which are a great help to beginners like me. I am looking forward to more posts from your end.
Very important suggestions, Steve. Thanks.
I´d like add the ND filter to smooth the water surface, in orden to isolate objects like rocks on the shore, rivers, lakes, etc.