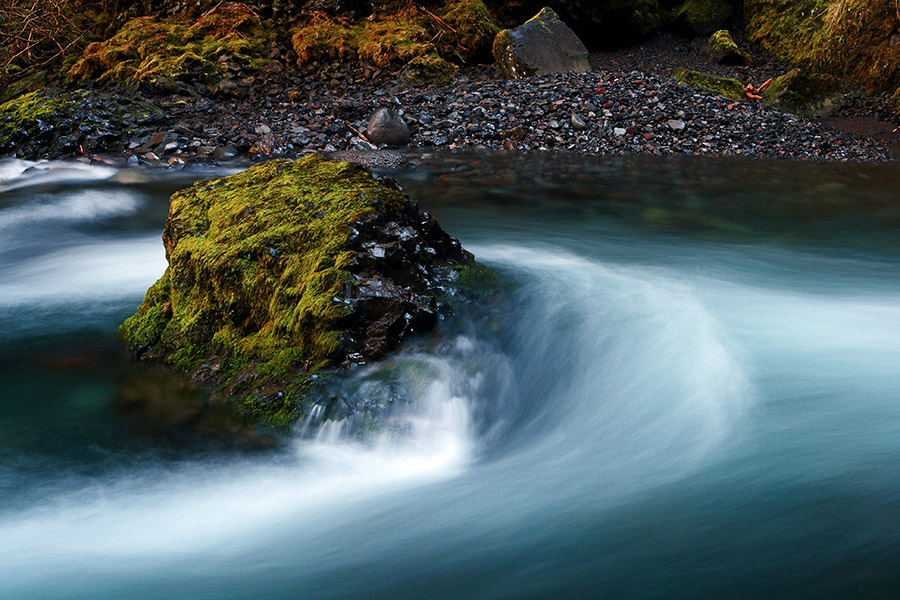
 A photograph is a still frame of a precise moment in time. So, although a photograph can’t show motion in the same way that a video can, there’s still a way to illustrate or imply motion in a photograph. You might want to do this for a variety of reasons: maybe your subject moves a lot or you captured it while it was moving and you want to show that movement, or you want to show motion to give more action to a scene or help guide the viewer’s eyes. In those cases, here are a few ways to show motion in your photos:
1 — Use a long shutter speed
You might already know this one, but the simplest way to show motion of your subject is to use a longer shutter speed. How long of a shutter speed you need depends on how fast your subject is moving, and how much motion blur you want to capture.
For example, the photo of the stream above was shot with a shutter speed of 4 seconds. This long shutter speed made the water appear blurred, which the viewer translates as motion. If instead I shot the image with a much faster shutter speed (e.g. 1/1000), then the water would’ve been more sharp and it would’ve looked more like a moment frozen in time. Neither way is necessarily the “right way” — it’s more about what you want to communicate in your photo.
2 — Capture lines and objects that imply motion

A less obvious way of showing motion in a photo is to use objects that imply motion. What I mean by that is photographing objects that the viewer knows are moving (and also paying attention to the direction of that movement).
For example, in the photo above, the clouds imply movement in the scene from left to right. Why? The viewer knows that clouds are constantly moving in the sky, and the natural lines of these clouds in the image help the viewer even more by implying the direction of that movement (from left to right in the frame).
Another way you can do this, if you’re photographing wildlife, is to photograph your subject when it’s in a position that clearly shows it’s moving. A photograph of a bird sitting on a branch doesn’t imply much movement, but a photo of a bird when it’s in the middle of walking across a beach does imply movement:

A key aspect of creating an image like this is to leave some empty space in the direction that your subject is moving. This gives the subject “room to roam.” If instead I would’ve cropped the image above more tightly around the plover (without so much space in front of it), then the bird would seem “trapped” in the frame and there’d be much less implied motion as a result.
What did I miss?
Is there another way you like to show motion in your photographs? If so, please share with us by leaving a comment below! Thanks 🙂
Get more nature photography tips in our free weekly newsletter
 About the Author: Steve Berardi is a nature photographer, software engineer, and founder of PhotoNaturalist. You can usually find him hiking in the beautiful mountains and deserts of southern California.
If one’s camera is able to take multiple exposures and blend them in camera, as my Nikon does, one can create motion that way. The major benefit of using this approach is that one doesn’t need any ND filters and can do this in broad daylight. I’ve used this on a waterfall with very good results.
I like to pan moving subjects to keep them relatively sharp while showing motion blur in the background. I think it could have been used even with the Plover–sharp (relatively) bird with motion blur lines of sand and water.
1. Panning: subject stays sharp, background becomes blurred.
2. Slower shutter speed, for example the bird on the beach – a little blur on the feet would suggest movement or for a bird flying a little blur on the wingtips would achieve the same result.
Yes, moving the camera (although this does have to be coupled with a not-so-fast shutter speed to be effective… panning at 1/8000 won’t give you much of an effect!).