 Pressing the shutter button to snap a photo seems like the most simple part of photography. I mean, you just “press the button” — right?
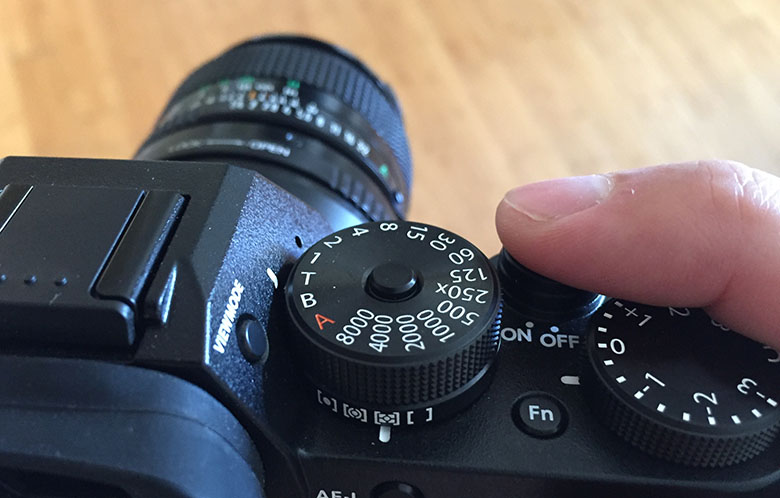
Well, there’s a few things to remember when pressing that button, especially when you’re handholding the camera:
1 — Press the button halfway first
You’ve probably noticed that you can press the shutter button halfway or all the way down. When you first got your camera, pressing it halfway probably initiated autofocus (but, hopefully now you use back-button autofocus).
With back-button AF (and if you’re in manual mode), pressing the button halfway does nothing to camera settings, but physically it’s important. Pressing the button all the way down in one press puts much more physical pressure on the camera than doing it halfway first, stopping for half a second and then going down the rest of the way. Physical pressure is important because with more pressure, you’re shaking the camera more and that increases your chance of getting a blurry photo and can mess up your focus point and/or composition (especially true for close-up images).
Also, be gentle when pressing the button — that’ll reduce even more physical pressure on the camera.
If you’re shooting in aperture priority mode, then pressing the button halfway may also set the shutter speed for you, so either be aware of that or switch to manual mode (it’s not as scary as you might think!) or see if you can disable that in your camera settings. I think some cameras let you set the back-button autofocus to ALSO set your shutter speed in aperture priority mode.
2 — Hold the button long enough to take at least three shots
Once you have the button pressed down all the way, it’s a good idea to keep holding it down until you get at least three shots. If your camera doesn’t take multiple shots when holding down the shutter button, then look for a “continuous shooting” mode and enable that.
This technique greatly increases your chances of getting a sharp photo. Almost every time I shoot images in a burst, the sharpest shot is somewhere in the middle. The reason this helps is because in nature photography when you’re hand-holding your camera, two things are almost constantly moving (even if just a little): your camera and the subject. To get a sharp and in-focus shot, you need to take the photo when both things are still AND when your camera is in the right position to get your desired focus point. That’s a lot of things that need to go perfectly, so taking lots of shots in a burst drastically increases your chances of those three things happening in at least one shot.
This is especially important in close-up and macro photography because with close-ups, you’ll often be going for a shallow depth of field, so that depth of field can change drastically if you move the camera even just a centimeter.
What about when using a tripod?
I think it’s a good idea to do these two things when using a tripod too, but it’s not as important. Even when you’re using a tripod, too much force can sometimes mess up your composition or focus.
If you’re using a remote shutter release, then you obviously don’t have to worry about physical pressure on the camera. But, I would still recommend taking a few extra shots for other reasons: maybe there was a gust of wind that you didn’t notice and that ends up blurring an important tree in your composition, or maybe a bird or insect flew into your composition for a second. Always a good idea to take a few shots and check them right afterwards too.
Get more great tips in our free weekly newsletter
 About the Author: Steve Berardi is a nature photographer, software engineer, and founder of PhotoNaturalist. You can usually find him hiking in the beautiful mountains and deserts of southern California.
Thank you for that information, I’ll definitely start immediately doing both. i was getting to throw in the towel, thinking it was me (which it still could be). !!
Wow ! Were you in my class on Thursday? I was the one swearing almost under my breath. Same thing. I wanted to toss my camera in the river, kick it down the steps and jump up-and-down on it. I felt like the biggest jerk beginner ! I still have film tendencies to really limit the number of frames I shoot, and perhaps the bad tendencies not to take my time and pay more attention. Bumping into these suggestions came with perfect timing. : ^ )
Thanks for posting this knowledge and tips . I appreciate it and will implement it
As always .Good sound advice
I will certainly give it a try. There are 2 disadvantages though. Firstly, you have 3 times as many shots to work through and secondly, your shutter has to work 3 times as often.
Thanks for the heads-up and I will certainly try this method of shooting!
Great photography is work! Pressing the button is just one of the first few steps. The hardest thing to learn is to be able to critique your own work according to composition, exposure, bokeh, sharpness, etc. … . If you want to get into photography as a business, part-time, or full time only releasing your best, sharpest, not done by anyone before shots is what will get you there. As Steve posted constantly check your work, adjust, and take plenty of shots, bracket them, then shoot continuous in bursts, and your results will be more rewarding – and the real work of post processing and selecting can begin.
Whenever I do use a tripod I always use a remote control, whether wired, or wireless! For night time astrophotograpy (meteor showers, star trails, moon, milky way, comet, aurora, a.s.o.) I sometimes also utilize an intervalometer remote, mirror lock up, long exposure noise reduction, and the always trusty view finder cover; the little plastic do-hickey included on at least every Canon camera strap used to, as its name implies “cover the view finder” to prevent any extra light from ruining the exposure during mirror lock up.
I have always done this but couldn’t remember why. I just knew it helped me prepare for the actual shot. Thank you for your help in the reasons this is a good idea.
I love that you share tips like this I find them all so helpful!