 The more I photograph nature, the less I’ve been concerned about sharpness. It’s not out of laziness, but from the realization that relative sharpness is much more important than absolute sharpness.
Absolute sharpness is about making your subject as sharp as possible, within the limits of your camera and lens.
On the other hand, relative sharpness is about making your subject as sharp as possible relative to other elements in that image.
This also applies to depth of field, and in this article when I mention sharpness I also mean depth of field/focus.
For example, here’s a photo with a lot of absolute sharpness:

Everything in this photo was perfect for making that dragonfly as sharp as possible: I positioned my camera so it’s sensor was parallel to the dragonfly’s body, I used one of the sharpest apertures of the lens, I waited until there was a break in the wind to keep everything still, I used a tripod, I kept the shutter speed fairly fast, and shot a bunch of photos in a burst. The result? A very sharp dragonfly.
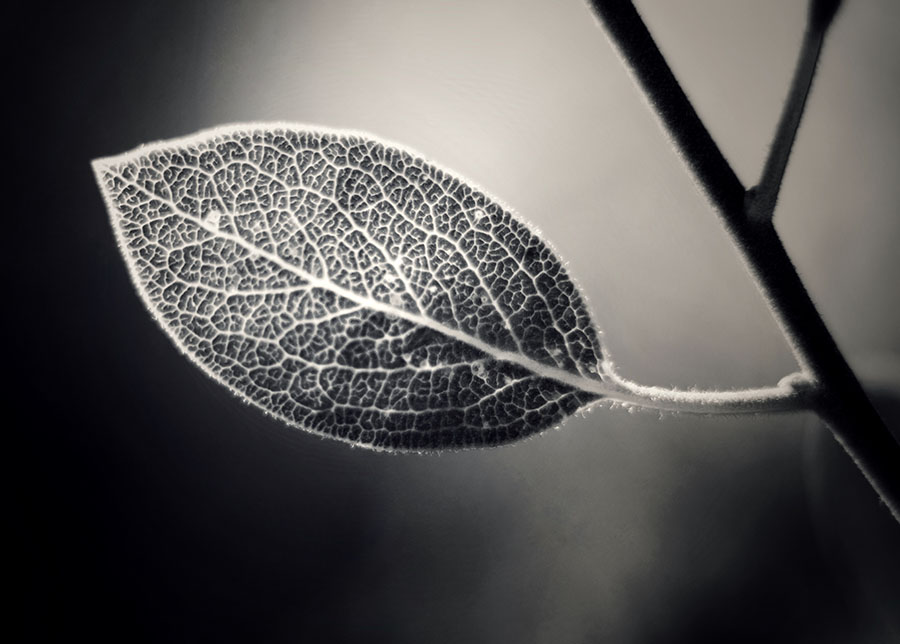
Here’s a photo with not much absolute sharpness, but a decent amount of relative sharpness:

The sage branch in the center of the frame isn’t nearly as sharp as it could be. But, relative to the background it’s sharp enough to stand out and give the perception that it’s sharp. It’s also just a little more in focus than the branches on the sides of the frame, making it stand out more. So, it’s not as sharp as possible, but I would say it’s sharp enough.
I think absolute sharpness is something great to strive for, but if you overemphasize it (like I did in the past), it can really get in the way of your creativity and prevent you from creating good images.
For example, maybe you chose not to photograph a butterfly one time because you couldn’t get in a position that made your camera’s sensor parallel to the body of the butterfly (while also having a good background from that position). In that case, you could’ve just tried photographing the butterfly from the good background perspective and sacrificed a bit of sharpness.
Sometimes you’re lucky and can capture your subject with a lot of absolute sharpness AND still have the artistic composition you were hoping for, but don’t let a little sacrifice in sharpness stop you from capturing an otherwise good photo.
The thing to keep in mind about sharpness and focus is that the viewer will usually look to the sharpest part of the image first. They don’t care too much about absolute sharpness, they just care about what’s sharpest (and it could be that everything is sharp too, like in a landscape). There’s a certain point of course where things would be considered “blurry” but I think you know what I’m trying to say here 
Get more nature photography tips in our free weekly newsletter
 About the Author: Steve Berardi is a nature photographer, software engineer, and founder of PhotoNaturalist. You can usually find him hiking in the beautiful mountains and deserts of southern California.
I am so glad you did this topic, Steve! Something over which I’ve been self-debating for far too long! It is rewarding to know that my thoughts are not that crazy after all – and that the likes of an accomplished artist (that would be YOU!) feels much the same as I. Whew! Back into nature tomorrow! Thanks, my friend. Happy you are back to share with us!
Thanks, Don! I appreciate the kind words
Thanks for this article Steve. More or less I have arrived at this conclusion, through trying different settings. When it comes together, the time spent is experience gained. Not in your league of experience, but do appreciate your articles. They help to push my options. As I prefer nature style images, this article has arrived at the right time. Being out in natures garden holding my camera, eases any mind burdens I am carrying, leading to see life as it is. All I need to do then is capture that image, to share with others.
Thanks, Roy! I agree, spending time in nature really helps clear the mind
Artistically speaking I’m more in favor of the second picture but I see the advantage and usefulness of both.
Hi Steve,
This is absolutely so. Sometimes i feel a little negative because my camera can not do what the much more expensive ones are achieving. Your article confirms what I was thinking all the time and it brings hope for many good photographers who cannot afford the high end equipment.
Best regards,
Ben Fouche.
Good point, Ben! Great photos can be captured by any camera, even the tiny ones on phones.
I agree totally with what Ben is saying. Your article has helped ease a lot of my frustrations, Steve!
This is great article I wish more judges in local camera clubs would have this attitude many are obsessed with tack sharp images and pull down scores of great images because their not tack sharp it’s quite frustrating