For example, the telephoto lens is often said to “compress” your scene and make everything look flat. But, it’s not the focal length that’s doing this. It’s actually because you’re so far from the scene you’re photographing (which is how telephoto lenses are commonly used: to photograph something far away). And, it’s because of this great distance that the scene looks “flat” in the final image.
As you move farther and farther away from something, you lose visual depth. For example, if you stare at someone’s face when you’re only a foot away from them, you’ll be able to see all the curves of their face pretty clearly, but as you step farther away from them, their face will begin to look “flat.”
So, when you decide to photograph a particular subject, choose your perspective carefully. The perspective you choose will determine the feeling you communicate with the image. If your image has foreground elements AND background elements, then also consider how you want that foreground to relate to the background. Remember that as you get closer to foreground elements, they’ll get larger at a much faster rate than elements in the background.
Once you find that perfect perspective, your next step is to find the appropriate focal length to fill the frame with your desired image. As you take more photos with different focal lengths, you’ll be able to instantly determine the lens you need, but if you’re not quite at that stage yet, here’s a brief overview of the different ranges of focal length and how their angles of view capture a scene:
Wide-Angle (10-40mm)
The wide-angle lens is the classic landscape lens because the short focal length allows you to capture a very wide angle of the scene in front of you. It’s great for capturing scenes like this:

Normal lens (50mm on full frame, 30mm on crop sensor)
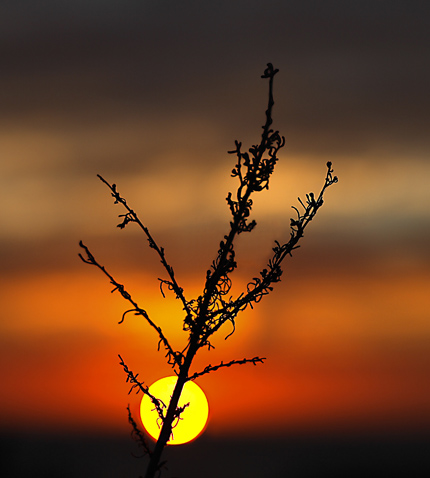
The 50mm lens is called “normal” because it represents the approximate angle of view (about 55 degrees) that our eyes have. So, a 50mm lens will capture a scene as our own eyes see it. Note that on a crop sensor camera, a “normal” lens would be at about 30mm. Most camera manufacturers make an inexpensive 50mm with a wide aperture, so these lenses are also useful for astrophotography or for getting a wide aperture at a low cost. Here’s an example of an image that was taken with a 50mm at f/2.8:

Telephoto (70-300mm)
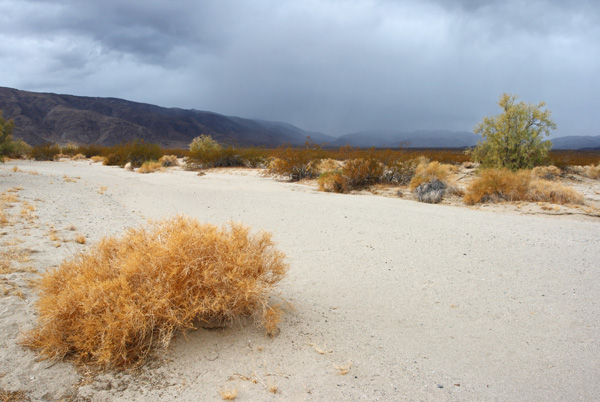
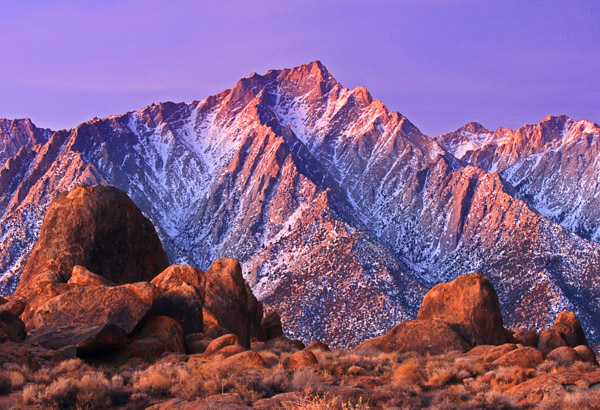
The telephoto lens is great for photographing distant landscapes, like the one below. Although this scene looks “compressed,” remember that it’s not the focal length that’s causing this–it’s only because I was standing so far away from those boulders in the foreground. I could have made this same image with a wide angle lens, but then I would’ve had to significantly crop the image later. With a telephoto lens I was able to fill the frame with the area I wanted.

Super Telephoto (300mm or more)
Due to it’s very small field of view, the super telephoto lens is great for isolating a subject against a specific part of a background, like with wildflowers. They’re also obviously useful for photographing distant objects that you can’t get close to (e.g. wildlife). Here’s a shot that was taken with a 300mm lens to isolate the flower against a green background:

For more information on perspective…
For more information on perspective and how it affects your final image, I highly recommend reading the Wikipedia article on perspective distortion, as well as Ansel Adams’ great book The Camera (particularly the chapter called “Basic Image Management”).
Get more nature photography tips in our free weekly newsletter
 About the Author: Steve Berardi is a nature photographer, software engineer, and founder of PhotoNaturalist. You can usually find him hiking in the beautiful mountains and deserts of southern California.
Steve – as usual, both your shots and explanations are expressive. Is there significant post-processing in the above 3 shots? I haven’t got down to that yet, apart from quick in-camera processing and Microsoft Office Picture Manager. I should be exploring Photoshop or some Nikon software next month – after my daughters wedding.
Thanks for sharing so warmly with us.
Thanks, Tiberman! Here’s a summary of the post-processing I did on the photos above:
Desert Landscape (photo 1): very minimal, just a basic S-Curve adjustment
Silhouette (photo 2): the sunset that day was the most amazing one I’ve ever seen, so it may look like I really boosted the saturation, but I didn’t. Just a basic S-Curve, and then some burning around the sun to make it a perfect circle (it originally had somewhat blurry edges cause of the wide aperture)
Alabama Hills and Lone Pine Peak (photo 3): I shot this photo before I mastered exposure, so I significantly underexposed this shot and had to correct that a lot in post-processing. I also combined two images here (one exposed for the sky and one exposed for foreground), so I had to merge them in Photoshop.
Wildflower (photo 4): Very minimal post-processing, just a basic S-Curve and dodging the flower a little to brighten it up (it was a little too dark in the original exposure).
Fortunately with nature, you don’t have to worry a whole lot about post-processing. With landscapes sometimes you gotta do some complex merging between two exposures, but most other types of photos you should only have to do minimal work–assuming you shot the photo well in the field 😉
Steve
Hi Steve,
With all due respect, the main idea behind this article (” there’s a common misconception that focal length determines the perspective of an image”) is completely false! It defies optics first of all which is science. I scientist will prove that you are wrong with formulae. How ever it takes some common sense and a few images to back my saying: http://www.photozone.de/focal-length-and-perspective
Next time you refer to Ansel Adams books please specify at least the edition and page. I doubt he could write anything in favour of this.
Sorry for being a bit “brutal” but I believe people should be responsible about their posts.
@Cristian – The series of images you have on the post you linked to actually helps prove what I’m saying here: that perspective is determined only by camera-to-subject distance, NOT focal length. In between your images, you not only changed focal length, but like you said (“so I moved my position”), you ALSO changed your position. When you’re performing an experiment like this, it’s very important you change only one variable at a time.
Here’s a few more sources with great explanations that backup my statements here:
The Camera by Ansel Adams. Fourteenth paperback printing, 2008. Adams mentions this common misconception about focal length / perspective numerous times throughout the book, but check out the chapter called “Basic Image Management” for a great explanation (pages 95-108). Specifically, look at page 97-98 (“Subject Distance”) and page 106 (“Subjective Properties of Lenses”).
Science for the Curious Photographer by Charles S. Johnson. This is a great “science of photography” book that was just published. For a discussion about focal length and perspective, check out the chapter called “Images: What is Perspective?” which starts on page 15 and ends on page 18.
And, here are a few more great resources I just found by doing a quick Google search:
Perspective, focal length, and camera position (Cambridge in Color)
Working with Perspective, Subject Distance and Focal Length (Earthbound Light)
Perspective Control in Images – Focal Length or Distance? (Canon Digital Photography Forums)
Hope that clears up any confusion!
Steve
Hi Steve,
You are right, the geometrical ratio between foreground/background does not change when you change the focal length, provided you measure images of still subjects always from the same point keeping the camera fixed. Please, make clear in which conditions you make the experiment. However framing of the subject does change dramatically in these circumstances, and that heavily impacts composition. What is the subject of my photo? Where do I place it in the frame? Changing the framing may even take your subject out of the frame.
Great info and beautiful pictures. I struggle, particularly with outdoor scenes, capturing (in pictures) the beauty I see in person.
Steve, thank you for this article, though I thought I have these things all figured out, I always find something new to learn. And this article taught me something new and interesting. Here’s the trick Q about the 2nd photo (sunset silhouette): it says there it was taken at f2.8 aperture with 50mm lens. I own nifty-fifty myself, so I figured this grass was somehow 2 feet away from you. So far so good. I just don’t understand how you’ve made the sun look so sharp. Considering all the blur everywhere else. Just wondering, will have to check out myself. Or, if you have the explanation, I will read it here (I do that sometimes 😉 ). Good luck and thank you for posting. This is a great blog.
@Bostjan – Good question! I actually did a little Photoshop work to make the sun that sharp. I normally don’t adjust an image like that in post-processing, but in this case it seemed okay. All I did was draw a selection circle for the sun and then used the burn tool inside that circle.
Hi, great work. You have presented your work so that the average person can learn without being bored to death with Pi are Squared on every type of teaching (for those of you common folk like me, we all know that PI are Round, Cornbread are Square). Back to my reason for posting a comment is about the third photo. It looks 3d, I love that photo. It absolutely makes me feel that I am there at the real location seeing it live for myself. You are very patient with your followers, as shown by having to repeat your “round sun” answer. Peace and God bless you. Jesus is Lord.
Stephen – thanks so much for your nice comment. My original goal with this blog was to try and explain some of the technical stuff in photography as clearly as possible, so it’s always nice to hear comments like yours! And, thanks for your nice words about the third photo–it was taken at one of my favorite spots in California (the Alabama Hills).
You call the 55 degrees of a 50 mm lens normal because it represents the angle of view that our eyes have. Do you have any science to back up that statement? I feel that 35 mm is much closer to our angle of view, and the fact that 35 mm has always been very popular with a lot of photographers bears witness to that. Also in my (not very scientific) estimate 35 mm is just the angle of view where my sight is fairly sharp.