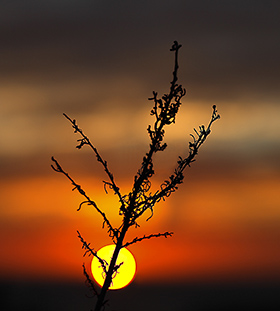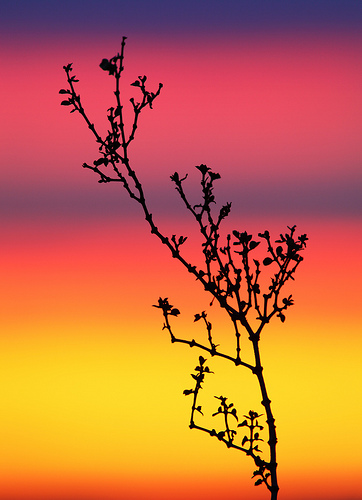
Although they’re simple looking images, here are a few tips for photographing them:
#1 – Use a telephoto lens
With silhouettes, you’ll usually want an out of focus background to help draw attention to your silhouetted subject. A telephoto lens will help you here by reducing depth of field. They’re not always required though (the image above was taken with a 50mm lens).
#2 – Shoot at sunrise to avoid wind
One of the biggest problems you’ll face when photographing silhouettes of plants is wind. Since you’ll be shooting in low light, a slight breeze will shake the plant enough to cause a blurry photo. One way to prevent this is to shoot at sunrise instead of sunset. The air is usually much calmer in the morning than in the afternoon.
#3 – Use a wide aperture
The wide aperture is good for two reasons: it helps make the background more out of focus, and it helps get you a faster shutter speed (which is good for battling the wind).
#4 – Wait for partly cloudy days
The most dramatic sunrises or sunsets occur when there’s a little bit of cloud cover. The light scatters through the clouds, creating some spectacular colors. So, keep an eye out for these conditions, and always wait until well after sunset or arrive well before sunrise. Sometimes the most magical colors don’t show themselves until these times.
#5 – Choose a subject that is “dull” looking in daylight
I love to use silhouettes as a way to visually capture some of my favorite “dull” looking plants. For example, when I first started exploring the Mojave Desert, I immediately became fascinated by the amazing adaptability of the Creosote bush, but it’s a visually unappealing plant:

So, to make it more visually appealing, I decided to photograph a silhouette of a single branch at sunset:

Silhouettes are a great way to take advantage of the stunning colors of a sunset or sunrise, and use them to emphasize the shape of something.
#6 – Keep it simple
Instead of trying to photograph the silhouette of an entire bush, or a group of clustered trees, try to focus on just one branch of the bush or just one tree. If you try to include too much, the image may end up lacking a central point of focus, which will confuse the viewer.
#7 – Find your subject well before sunrise or sunset
Since silhouettes are meant to emphasize the shape of something, it’s important you find a subject with a really nice and balanced shape (or really unbalanced could work too). Finding this perfect subject could take awhile, so it’s important to do your scouting well ahead of time. A good goal is to be in position at least thirty minutes before sunset.
#8 – Use a fast shutter speed
Since you’ll be dealing with low light, it’s important to use a fast shutter speed to help battle the wind and freeze the action of any moving subjects. A wide aperture (as I mentioned earlier) will certainly help with that. But, you can also try increasing your ISO to get that fast shutter speed.
What did I miss?
If you have another tip for photographing silhouettes, please share it with us by leaving a comment below! Thanks 🙂
Get more great tips in our free weekly newsletter.
 About the Author: Steve Berardi is a naturalist, photographer, software engineer, and founder of PhotoNaturalist. You can usually find him hiking in the beautiful mountains and deserts of southern California.

#8 – Use a tripod (but that tip applies to most all nature photography doesn’t it)
How to you set the exposure? Do you meter off of the sky?
I’ll have to get up early this coming weekend and give this a try with my newly acquired 70-200 f/4L lens 🙂
Hi Steve,
Always enjoy your photography tips, but didn’t hear back regarding a photo critique I requested a few months ago. Are you not providing this service any more?
Frank
Thanks for the tip, good advice on. Making something dull much better.
Forgot to mention in my previous e-mail, but I find generally I get better colour saturation if I meter the sky and underexpose it at least 1/2 a stop. I sometimes have to use a small aperture if there is dramatic detail in the sunset I wish to capture, and manually focus slightly behind the foreground to ensure both sky & foreground are in focus (tripod essential here).
@Zack – Great addition! The tripod is almost always essential for getting sharp photos and definitely useful for silhouettes. For exposure, I do what Frank mentioned above: meter off the sky and move about one stop down. Since it’s relatively dark when I shoot silhouettes, I usually trust the LCD preview and review the photo afterwards (in the daylight though, I only look at the histogram). Great choice with that lens, btw 🙂
@Frank – I apologize for not responding to your critique request! Matthew has been super busy lately, so we’ll probably be discontinuing the podcast… so won’t be doing critiques anymore. I’ll try to look for the photo you sent me though, and write back what I think, or if you have a different one, please feel free to email me. Also, great tip about exposure! I do the same thing and it’s worked pretty well for me too.
I’ve been looking around for a good way to increase my knowledge about photography (which isn’t much), and this site is an awesome resource. Thanks!
# 9 Read about and look at the many as possible photos you can, and then get out to try it.
Great photography tips to follow.
awesome shots.
would like to follow ur step, lol…..
btw,thanks for the tips.
Tip – turn around. Sometimes the most intense colors are behind you.
On the first photo on this page titled: “silhouettes3” how is it possible to have the main subject and the sun both focused when they are both far way from each other…. photoshopped it?
Great tips, Steve!
Water reflections of the colors in the sunsets can cause dramatic effects for silhouettes. 😀