Over the winter, I picked up several excellent flower photography books and a few showed some techniques for indoor photography. So, I thought, why not give this a try and see if I can apply what I learned to outdoor wildflower photography. I didn’t have any studio lighting, so I decided to experiment with what I already had.

In the photo above, you can see my setup: Canon 60D with a Canon 100mm f2.8 macro lens, a trigger release, a Gitzo GT2530 tripod with a Kirk BH-3 ballhead, and on the left is a chair with a colorful fabric draped over it to provide a background for the Phalaenopsis orchid in front of it. These orchids, which are native to much of southeast Asia, can be purchased at many garden centers, even some grocery stores. They provide a perfect subject for experimenting with new techniques.
There are also many other potted flowers you can try and many cut flowers make excellent subjects too. Cut flowers won’t last as long as a potted flower, but they’re also less expensive and available in a larger variety.
Back to my setup above, the only lighting here was provided through the kitchen windows. The sky outside was thinly overcast with glowing bright white light from the mid-afternoon sun. Snow was on the ground too, so overall there was an extremely bright and ideal diffused sunlight. Plus, it helped that the walls in my kitchen are also white and reflected this light over the entire room.
Another important element here is to have some choices in background. I went to a fabric store and bought several square samples of various colors and patterns. It’s important to know about the Color Wheel when selecting contrasting colors for your flower photography.
After some experimentation, here is the photo I created and converted directly from the RAW image with minor adjustments (levels adjustment and slight sharpening.) The camera settings were ISO 400, f/8 at 0.3 seconds.
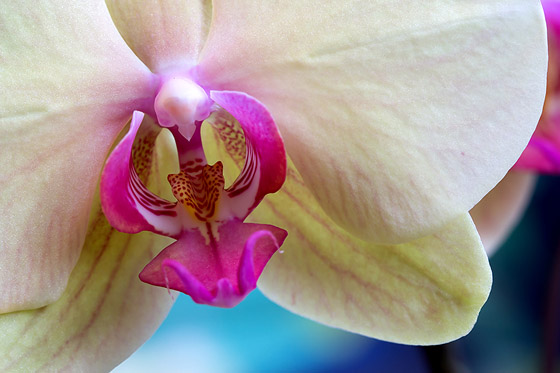
Although this image is acceptable as is, I went further and applied the Orton Effect to it to bring out the colors more and give it that dreamy look. Here is the same photo with the Orton Effect applied:
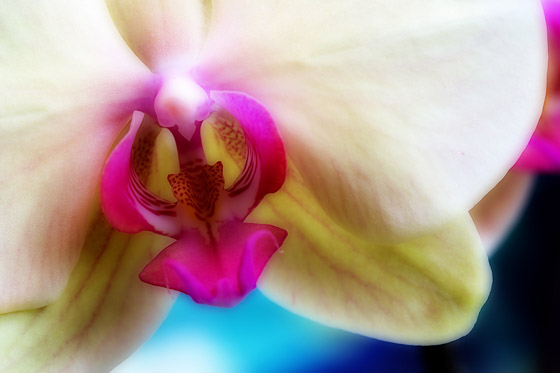
Keep in mind, you (as the photographer) have to make the decision on what post processing to utilize and what message you want to send in your photos. More on the Orton Effect can be found from a quick Google search.
The single most important element is the aperture (f-stop) you use. The aperture is what you have to experiment with here and also the distance you have to work with the background. A limited space and overall size of the background have to be considered. As you can see from the setup image above, I had limited space. This is important because of the depth of field: you don’t want the background to overpower your image. It should enhance or complement it only. If your camera has a depth of field preview button, you can use it to see how the background looks at a particular aperture.
If the background becomes an issue, you have two choices that will alleviate the problem.
The first is to take very close shots that eliminate the background altogether. For this you’ll either need a true macro lens or use extension tubes. Cropping is also an option if it doesn’t jeopardize the overall quality of the photo.
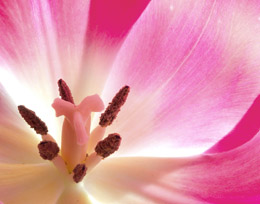
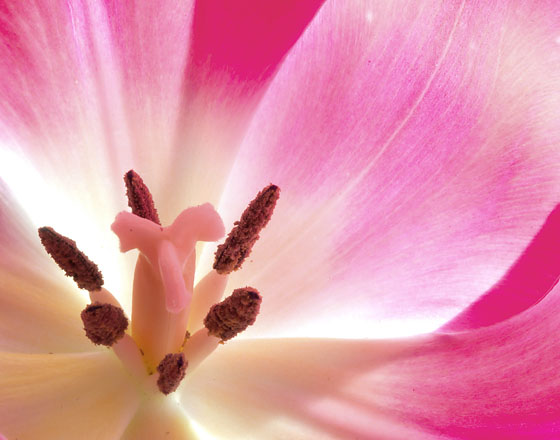
Below is an example of a tight closeup of a tulip where the background isn’t a factor. Other than an overhead kitchen light, the only other lighting came from the setting sun as it came through the kitchen window. This sunlight coming at the flower at a right angle really made the bottom of the flower glow. The same camera/tripod setup mentioned above was used. Settings were ISO 100, f/32 at 13 seconds.
The second option you have is to use a black background. In the photo below, of a Sun Lily, I used a piece of black velvet, with the only light coming from an overhead incandescent kitchen light and diffused sunlight coming from the right side of the photo. Settings were the same as the previous photo; ISO 100, f/32 at 13 seconds.
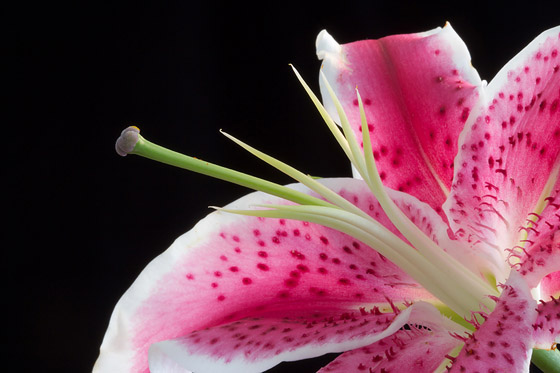
As you can see, no artificial lighting other than an overhead kitchen light was used in these photos. Use of a flash unit may help with fill-light where contrast is an issue and also to achieve other effects. More on the use of flash will be covered in a future post
Perhaps the most rewarding thing about trying this technique is how much you’ll learn. Doing this indoors on a chilly late winter day with a pot of coffee nearby and no outside elements to contend with, offer a relaxed approach to learning more about lighting, depth of field, background and composition. Experimenting with these elements will make you a better wildflower photographer in the long run!
If you enjoyed this article, and would like to read more, please signup for free updates by email or RSS.
 About the Author: Vic Berardi is a raptor lover that lives in the Midwest. He is the founder of the Illinois Beach State Park Hawk Watch and every weekend of the year you’ll find him searching for hawks and photographing them. Several of his photographs have been published in a leading raptor journal and in articles he has written. During the year he gives presentations teaching others about hawks and hawk migration. Vic also photographs dragonflies and wild flowers and is always respectful of nature and its creatures.

Thanks for the ideas and the “push/kick/shove” to get out and take some pictures.
Bill
This is a great article which is inspiring and I’m sure to get going on some of the techniques here. Orton effect did a great job above and I love the black background. I’ve used it on some flower photos in the past.
Good post and thank you. I will bet the articulating monitor on the 60D helped with the focus in the setup pictured. I wish the 5D Mark III had one. It really helps with aged knees and wildflower pictures.
Vic Berardi, another informative post about a subject that enchants all nature photographers … Thanks for sharing!
I’m looking forward to the article on flash!
Greetings from Brazil!
PS. Forgive me because I do not speak English.
@ Bill, thanks! Glad the article motivated you!
@ Jan, thank you too! And yes, the Orton Effect is a neat technique to apply to certain images.
@ Dick, thanks! Funny you mention the articulating LCD screen on the 60D, it is the number one reason I bought it because I too have some trouble getting down to ground level. And it is far better to work with than a right angle viewfinder.
@ Marcus, thank you! Your English is fine! I’m in the process of experimenting with flash to see what potential it has for field photography, both artistically and functionally.
Excellent job Vic.
Great article Vic!
I really enjoyed the read and included photographs. The images are gorgeous and the fact they were taken indoors under conditions that almost anyone can duplicate makes this article so much more interesting and appealing. No doubt others will give it a try when the weather for them is not cooperating either! I really like the Sun Lily because you achieved the black background that almost always is explained online but with the use of flash. Your photo is a perfect example of achieving the all too often desired “black” background BUT it eliminates introducing the harsh contrast that usually results from an external flash source (fill or otherwise). That is a whole other animal that is not easily learned and I’m sure many, including myself, appreciate your advice and examples of what can be achieved on an otherwise uneventful day AND without flash!!
Looking forward to more articles!
Thanks Vic,
Robert Visconti
Thanks Ricky, glad you liked it
Robert, thank you for the kind remarks! Yes, this is an easy approach that can produce results almost immediately. Plus, the added benefit is to apply what you learn to outdoor wildflower photography. As I mentioned, no flash was used on any of these photos, only light from the kitchen windows and on one photo, an overhead incandescent light bulb too. Flash use is a whole different philosophy for me, I want to use it when I need light but don’t want the photo to show I used it, if that makes any sense
wow! i just did it last week.
but i’m using wrapping papers as the background, as it cheaper and easier to find
but need more practice to get a better shot.
Good idea Miaz! I’ll have to try that out, thanks!
This is an incredible article. I have been reading and trying to apply your techniques with some success and it has made my photography so much more enjoyable.
Keep up the good work.
Many thanks
Thanks Alan! Good to hear the techniques in the article enhance your photography and make it more enjoyable!
Wonderful shots. In the last image the light appears to be coming through on the right. I think it shows possibilities of having backlighting with flowers.
Frank, thank you! Yes, the diffused outdoor lighting was coming from the right in the Sun Lily photo and the overhead kitchen light provided the rest. Basic but effective!
I just finished reading 14 of your articles and would like to comment on each one. However, I don’t have time to insert my name, email, and web site on each one. Perhaps you could change your settings to either get the information automatically (I did fine one blog the other day that did that) or change it so that we don’t have to enter it each time. Maybe you could also let us “like” posts.
I have several 8 1/2×11″ felt sheets in varied ‘muted’ colors – black, offwhite, green, brown – i use them as a background when i need to simplify the setting. With a shallow DofF the fabric ‘thread’ is blurred and the muted earthtones make the flower jump out.
I use miniature clothespins and 3/16″ wood dowels to place n hold the fabrics. Sometimes i am unable to prop the sheets so i handhold them and use my wireless remote to trigger shutter.
I have gotten many positive comments on the lowers with the backgrounds, most folks cant tell what/how but they notice some major dofference.
The felt sheets, mini-clothespins and wood dowels are all from my local crafts store! A treaure trove of props, set-ups, even fake flowers that when shot correctly are very relistic…
I forgot one important detail! Great article!! As with all of your articles, always something to refine, add, enhance my photography! I’m an old hand (oh so old!) at this, starting out with an slr decades ago, thru wet darkroom days to reluctant but absolute conversion to digital ten years ago. If one ever stops learning, it doesnt indicate perfection has been reached, rather it indicates stagnation
Keep up the great work.