 Noise is that ugly discoloration that makes your photos look “grainy” (like in the image on the right, where the noise has been exaggerated to make it more clear). It’s one of the most annoying things you’ll have to deal with in digital images.
Although you’ll never get rid of noise completely, there are a few things you can do to reduce it so it’s barely noticeable by the viewer:
#1 – Get a good exposure
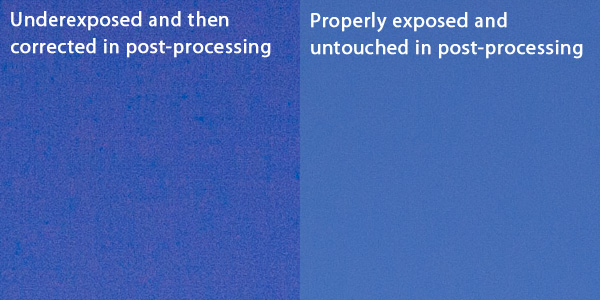
The best way to avoid noise in your photos is to get the best digital exposure possible, by using the histogram. This will ensure you maximize the signal-to-noise ratio in your exposures. If you underexpose your photos and try to fix it later in post-processing, you’ll start to get a ton of noise like in the example below:

The image on the left was severely underexposed, and when I tried to fix that in post-processing, all I got was a bunch of ugly noise. On the other hand, notice how the properly exposed image on the right has virtually no visible noise.
#2 – Use lower ISOs if possible
As you increase the ISO on your camera, the noise in your images will also increase. With newer SLRs, this noise usually becomes pretty noticeable once you get past ISO 800. So, to avoid noise, use the lower ISOs available on your camera.
But, don’t be afraid to use higher ISOs when you truly need them. They come in handy when you need faster shutter speeds, like when you’re photographing birds or wildflowers. Even the extremely high ISOs (ISO 3200 or higher) are useful for some types of images (such as photographing the night sky with lots of stars).
#3 – Only sharpen areas of the image that need it
Sharpening works by increasing the contrast between light and dark edges, so it’ll actually sharpen noise too and make it stand out more. That’s why it’s best to just sharpen the stuff you want sharpened, by using layer masks in post-processing.
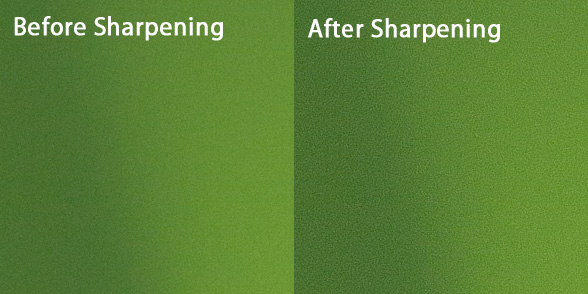
If you sharpen an out of focus background, for example, you’ll end up increasing the strength of the noise in that background. Here’s an example:

Notice how the sharpening made the noise more visible? This is why you want to control what parts of the image are sharpened.
#4 – Turn on noise reduction for longer exposures
Once you start getting into longer exposures (anything more than one second), noise starts to become a bigger problem, so most newer SLRs have a special noise reduction option for long exposures. It’s usually buried in your camera’s menus somewhere, but it’s worth turning on for those longer exposures.
More Information on Image Noise
For a more technical explanation of image noise, check out these great resources:
- Digital Camera Image Noise at Cambridge in Colour
- Image Noise at Wikipedia
Get more great tips in our free weekly newsletter.
 About the Author: Steve Berardi is a naturalist, photographer, computer scientist, and founder of PhotoNaturalist. You can usually find him hiking in the beautiful mountains and deserts of southern California.

Thank you, I had just processed an underexposed photo of a Verdin and was puzzled by the noise when I dodged the edges n sharpened. Your articles are a great help.
Appreciate the articles and helpful information. Quite a few of them I print out for future reference and they have all helped in my photography world.
Good article Steve.
Hey Steve, nice article mate! Have you ever tried the high ISO noise reduction?
Cheers, Richard
Richard – I’ve never tried the high ISO noise reduction, mostly because I haven’t really used the higher ISOs (I usually stick to 100-400). I can see how it’d be helpful for those super ISOs though that come in handy for night time photography (e.g. ISO 1600+).
Steve,
It would probably be a lengthy article but I am sure others would love to know about how to use masks to isolate specific image areas as well as the “median” tool option when working with noise reduction.
Thank you again for showing me those techniques up north!!
Robert
@Robert – Great idea! I think I’ll break up those topics into two separate posts.
Thanks Steve for diverting me to this article, I will experiment with the ISO’s 🙂
Great points, Steve. One sharpening technique one guy showed me years ago was to do sharpening only in the ‘green channel’ as that’s the area that defines edges the most, probably like masking in a way. Seems to work and avoids those areas that ‘draw attention’ to our sharpening mistakes.