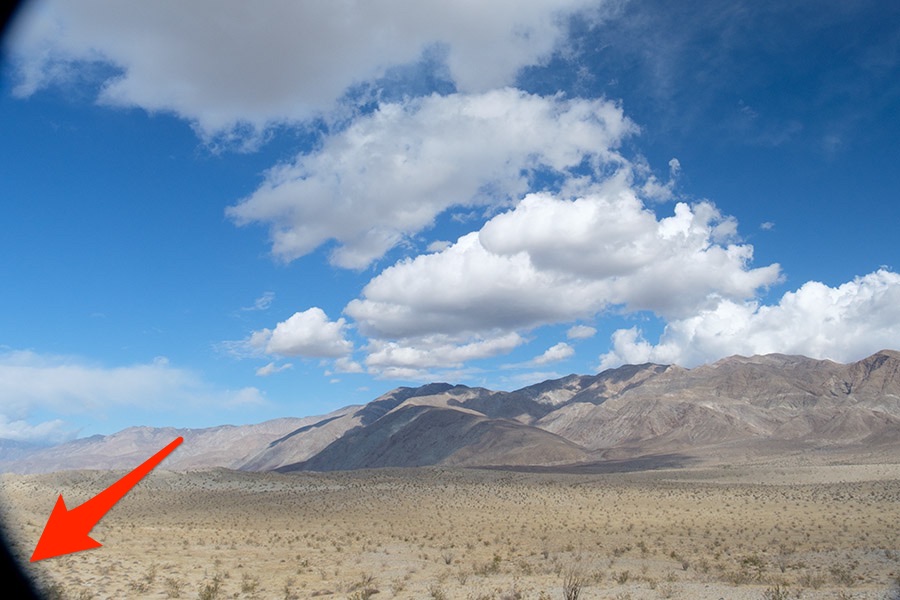
 Filters can be very useful in nature photography, especially for landscapes. They can do all kinds of things, like get rid of unwanted reflections, saturate or darken the sky, and help you get a longer shutter speed to show motion.
But, when you’re using filters on wide-angle lenses (anything at 40mm or less), there’s one thing you need to watch out for: vignetting (like in the photo above). This usually only happens at very wide angles and if you’re using more than one filter.
So, how do you avoid this problem? Your first thought might be to avoid those wider angles when using filters, but don’t let filters limit your creative freedom! Luckily, there are a few good solutions to this problem:
1 — Use slim filters for wide-angle lenses
If there’s only a small amount of vignetting, then you might be able to solve the problem by using slim filters which are usually half as thick as regular filters. You may be able to get by with just one slim filter or you might have to get slim versions of multiple filters to completely get rid of the vignetting.
There are a few things you should keep in mind with slim filters though: lens caps don’t always fit on them, you can’t always stack more filters on top of them, and your options may be limited depending on what size you need. For example, my favorite filter maker is B+W, but they don’t make a slim 77mm multicoated polarizing filter that works with lens caps.
2 — Use fewer filters
Another way to get rid of that vignetting is to just use fewer filters! Go through each filter you have on your lens, and ask yourself if you really need it for this image you’re creating. One filter you might be using that’s almost never really necessary is the UV filter. Maybe you keep one on all your lenses to help protect them, which I do too. But, when you start seeing vignetting because you added another filter on top of the UV filter, then consider removing the UV filter temporarily for the shot.
3 — Remove vignetting in post-processing
If you can’t use fewer filters or slim versions of them, or you just didn’t notice the vignetting until you looked at your photos when you got home, then another option is to remove the vignette in post-processing. As long as the vignette is small (like in the photo at the top of this article), this should be easy to do: just find the clone stamp or healing brush in your post-processing app and use it on the corners of the image.
Get more nature photography tips in our free weekly newsletter
 About the Author: Steve Berardi is a nature photographer, software engineer, and founder of PhotoNaturalist. You can usually find him hiking in the beautiful mountains and deserts of southern California.
Another issue to watch out for is using a polarizer on wide angle lenses. This will most often end up with uneven polarization across the sky(darker, more saturated in the middle fading to lighter and less saturated towards the sides). Something, especially with large expanses of cloudless sky is very noticeable and very difficult to correct in post processing.
How about trying a slim step-up ring which allows the use of a larger filter? I use this for ND filters so that I have one set of these (77mm) and a few (much less costly) step-up rings for smaller diameter lenses.
Great article. Another tip that worked for me is to use wide-angle adapters for the drop-in filter systems and to make sure that the rectangular system is large enough for the camera system used (e.g. 100 mm for full frame). I am using Formatt-Hitech 100 mm drop in filters (not an endorsement!), and they offer wide angle adapters that result in the drop-in filter system to get closer to the lens , and hence minimize or avoid vignetting (of course in conjunction with being large enough for full frame lenses). For DX, I think at least 85 mm is recommended.