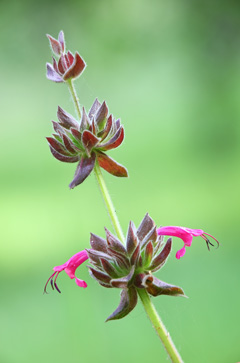
An out-of-focus background is essential to a good close-up photo, because it helps draw attention to your main subject.
But, it’s not always easy to get that nice background. Sometimes the background is just too close, or your subject has a lot of depth (forcing you to try a smaller aperture, which then puts more of the background in focus).
So, how do you deal with this constant battle? Well, here are a few ways:
#1 – Determine the most important part of the image
The first thing you should think about is the most important part of the image. You might think this would always be your main subject, but sometimes the background plays a larger role. Ask yourself what grabbed your attention about this particular flower or insect: did you see the background first? Or, perhaps your subject is extremely rare, so just getting any kind of photo of it is the most important thing.
#2 – Use the depth of field preview button
Once you’ve determined the most important part of your image, then you can start looking for that perfect aperture by using the depth of field preview button. When you set the aperture and then press this button, you can look through your viewfinder to see what the image will look like at that aperture. The button is usually located on the front of your camera, near the lens mount.
#3 – Don’t obsess over sharpness
Sometimes it’s really easy to focus too much on getting the sharpest image possible, because it’s one of the things you can immediately see in a photograph and there are simple rules to follow for getting sharper images. But, good composition is more important than sharpness. Don’t be afraid to sacrifice a little sharpness (by using a wider aperture or moving your camera closer), if it means a better composition.
#4 – Don’t be afraid to keep searching for a better subject
If you’ve tried photographing your subject from a bunch of different angles and apertures, and still can’t find a good balance between an out-of-focus background and a sharp subject, then you may just have to look for another subject. Don’t think of this as a failure, just remember that good nature photos take time.
What did I miss?
If you’ve found another way to help find that perfect balance between an out-of-focus background and a sharp subject, then please tell us about it by leaving a comment below. Thanks! 🙂
If you enjoyed this article, and would like to read more, please signup for free updates by email or RSS.
 About the Author: Steve Berardi is a naturalist, photographer, software engineer, and founder of PhotoNaturalist. You can usually find him hiking in the beautiful mountains and deserts of southern California.

Take multiple exposures with the aperture wide open, each at a different point of focus to cover the full range of the subject, which is to stay sharp. Then use PS’s Depth of Field extension capability to align and blend the images, leaving you with sharp subjects and out of focus backgrounds. I tried to explain / illustrate it in my blog. http://ajh57.wordpress.com/2012/02/15/macros-stage-three/
One should also never forget that there is double the depth of field behind your focal point as there is in front. This is always important to remember when trying to get several subjects (ie. flowers) in focus, or determining which of those you wish to be made clear.
How about “bring your own background”? Use a diffuser, a black reflector cover or colored fabric for a background AND wind shield.
#2 – Don’t think I’ve every used that button on my camera. I’m going to try it the next time I’m out shooting. After I figure out where it is, of course :).
If I have trouble getting a good blurred background and still can’t get the flower as sharp as i’d like I try using an artistic filter I try solarize in Photo Shop Elements. The artistic filters i usually use are water color and paint dabs. I’ve saved a lot of out of focus images that way. I do not use a tripod (too heavy to carry and it inhibits my freedom of local movement. But most of the time it is external forces that cause the out of focus.
Another technique that I have used is to put a close-up filter on the front of a lens. Although the main use of the filter is to allow you to be able to focus at a shorter distance than is normally possible for a lens, it also decreases the depth of field. I have sometimes used it exclusively for the decreased depth of field effect to blur a background.
#2 – the DOF preview button is great but I have found it to be much more useful on a camera that has a live preview on the LCD. Using the viewfinder sometimes the image becomes too dark with the DOF preview button pressed to really see what is going on.
A plamp can save the day when there is enough wind to move the flower.
Sometimes, smaller IS better … shorter focal length macro lens will increase the depth of field in closeup photos so, use a smaller sensor camera which will have a shorter focal length lens!
I like to use my Leica VLux (see my blog sample shots) or a reversed movie camera or photographic enlarging lens (with a very short focal lengths) as I describe, there.
But, my favorite lens for shooting living, moving objects like butterflies and bees is my Nikkor 75-300 vr which will focus a macro shot at approximately 5 feet away. This lens has an especially nice, bokeh for creamy soft backgrounds and lets me keep my distance from stinging insects, etc..