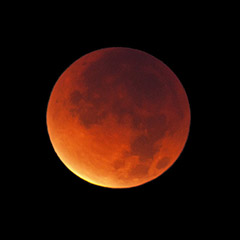
In a total eclipse, the moon turns red (due to the way the light from the Sun is scattered as it passes through our atmosphere), and it’s truly a beautiful sight!
Here are some tips for photographing the eclipse:
#1 – Find the time of the eclipse in your area
Here’s a helpful website that will tell you when (and if) the eclipse will be visible from your city:
See what time the eclipse will begin in your area! (scroll to the bottom)
#2 – Use a long lens
Okay, this one is obvious 🙂 To get a good quality image of the moon, you’ll want to fill the frame as much as possible, so that means using the longest lens you have. If you have any teleconverters, be sure to use those too!
For moon photography, you’ll want at least a 300mm lens. But, the longer the better!
#3 – Use a wide aperture and high ISO
The most difficult part of photographing an eclipse is that the moon is constantly moving, and it’s moving pretty fast (relatively speaking). Since you’ll be using a long lens that movement will be magnified–so, you’ll need a fast shutter speed to help “freeze the action” of the moon moving.
But, the problem is that when the moon is at total eclipse (i.e. dark red), it’ll be much darker. This means longer shutter speeds.
So, what can you do? Well, one way to help get a faster shutter speed is to use a wide aperture (f/8 works well) and a higher ISO (400 or higher). If you’re just photographing the moon, you really don’t need a lot of depth of field so an f/8 aperture works well.
#4 – Use a tripod
Since you’ll be using a long lens and you’ll need a long exposure to capture the dark red moon, it’s essential that you use a tripod to keep your camera still. It’ll be annoying to constantly re-adjust your camera as the moon moves across the sky, but it’s pretty much impossible to get a sharp image of the moon while handholding your camera.
#5 – Keep the moon in the center of the frame
Lenses are usually the sharpest at the center of the frame. So, when you’re photographing something that won’t take up the entire frame, it’s a good idea to keep it at the center so you can maximize the sharpness of your subject.
With the moon moving so quickly, you’ll have to constantly reposition your camera on your tripod, but for a little extra sharpness, it’s worth it, right?
#6 – Photograph the moon at different phases of the eclipse
Although the moon certainly looks cool when it’s at total eclipse, you might also want to photograph the moon at other phases of the eclipse. One popular thing to do is photograph the moon at multiple phases and then create a composite image of all the phases together.
#7 – Learn more from these great articles!
For more tips and techniques on photographing the lunar eclipse, check out these great articles:
- How to Photograph a Lunar Eclipse – by Nikon USA
- Planning a Lunar Eclipse With The Photographer’s Ephemeris – by The Photographer’s Ephemeris
- How to Photograph a Lunar Eclipse – by Fred Espenak
What did I miss?
Is there something else you’ve learned from photographing a lunar eclipse? Please share it with us by leaving a comment below, thanks! 🙂
Get more great tips in our free weekly newsletter.

 About the Author: Steve Berardi is a naturalist, photographer, software engineer, and founder of PhotoNaturalist. You can usually find him hiking in the beautiful mountains and deserts of southern California.
Leave a Reply