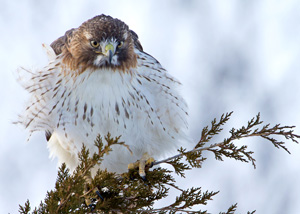
If you’re like many beginning bird photographers, then you check the weather forecast hoping it calls for sunny blue skies. But, then you get depressed when the forecast calls for “mostly cloudy skies” and a chance for rain or snow. You begin to wonder why you have all that expensive camera equipment!
But don’t fret too hard about it! Yes, it’s true that deep blue skies can be great for photographing birds in flight, but it’s actually cloudy skies that create the lighting situations for the most dynamic or dramatic photos, especially those of perched birds.
There are basically two kinds of “mostly cloudy skies” that we have to deal with:
Heavy overcast skies like this:
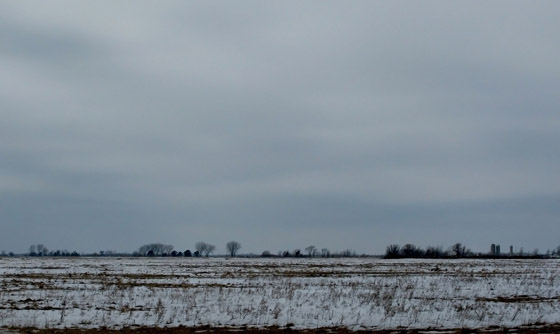
Or bright white clouds like this:
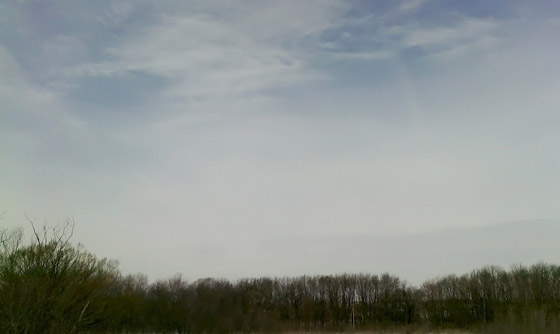
If you just shrugged at the sight of those skies, then read on! Both of these situations present similar problems: low light and tough backgrounds. However, both of these problems can be a benefit if utilized properly.
Tackling low light requires using wide open apertures, slow shutter speeds and/or higher ISOs. Using a tripod can help with slow shutter speeds, but relying on lens stabilization is usually more practical in bird photography. However, on flying subjects lens stabilization has less of an effect so other techniques need to be considered. Also, some lenses hinder the use of lens stabilization while being used on a tripod. Check your manual for these details. It’s also important to fully understand proper exposure settings. With low light, it’s very easy to underexpose the bird and/or overexpose a bright white sky.
Let’s look at a few photos and see how each one was made.
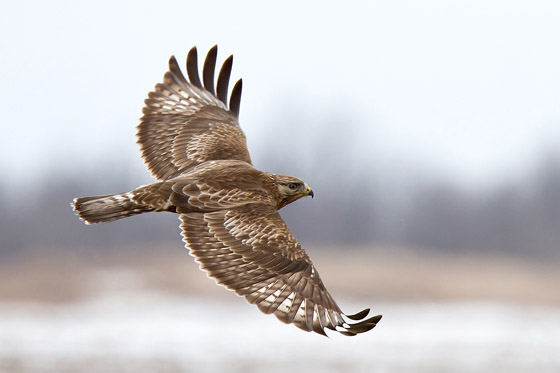
Our first photo is that of a juvenile dark morph Rough-legged Hawk. Being a subject that is somewhat dark, a perfect exposure here is extremely important. Skies were medium dark overcast, but because we’re exposing for the bird, skies will appear brighter than they actually are. A key to flight shots with overcast skies is to take pics of low flying birds that offer some kind of distant background to contrast against.
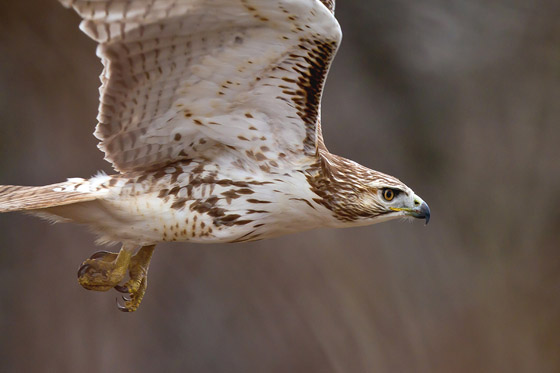
An even better background would be one that shows no sky at all, only foliage that is blurred as in this shot of a juvenile Red-tailed Hawk.
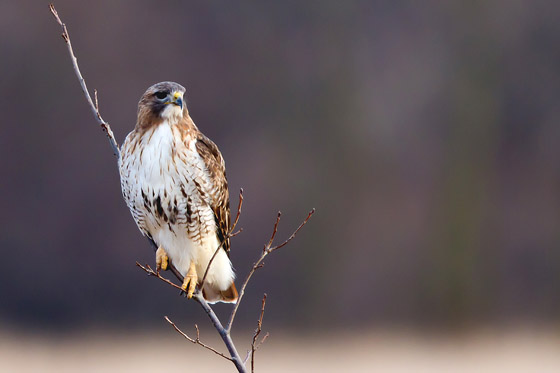
Or this perched adult Red-tailed Hawk.
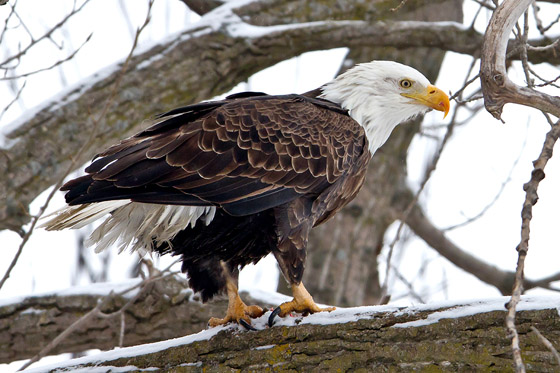
But, what about a bird with a white head against a bright white sky? Well, if you can maneuver your location to offer a dark subject behind that white head, then your problem goes away, as in the shot below of an adult Bald Eagle. Note too, that bright white skies greatly filter the sunlight and balance (or compress) the range of dark to light tones. Filtered overcast skies also extend your picture taking hours to include most of the day, not just those “magic hours” of sunrise or sunset. This same photo taken under very bright sunlight at midday would create harsh shadows that would be distracting. You probably wouldn’t see the darker feather detail either.
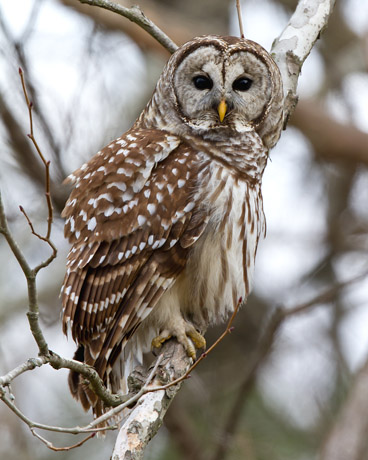
Another example is this Barred Owl photo below, where the filtered sunlight acted as a diffuser and provided balanced lighting across the entire image of the bird. Note also on this photo the settings used. Because I was so close to this bird, depth-of-field was a concern so I increased the aperture to f/8 but had to reduce shutter speed to 1/200 seconds. This might seem impossible to achieve handheld but with good technique and the use of lens stabilization, images like this are attainable.
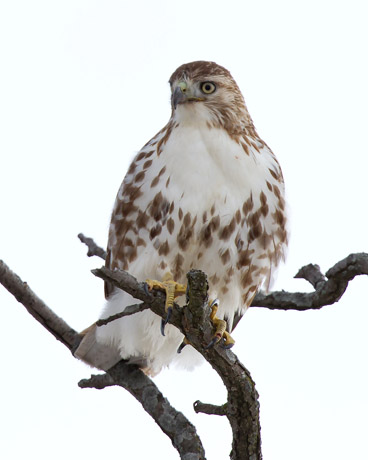
But, even those bright white skies can add to the photo and make the bird look even more beautiful by creating softer tones that might get lost if there was more contrast in the scene. Here’s an example of a lightly toned juvenile Red-tailed Hawk against a bright white sky.
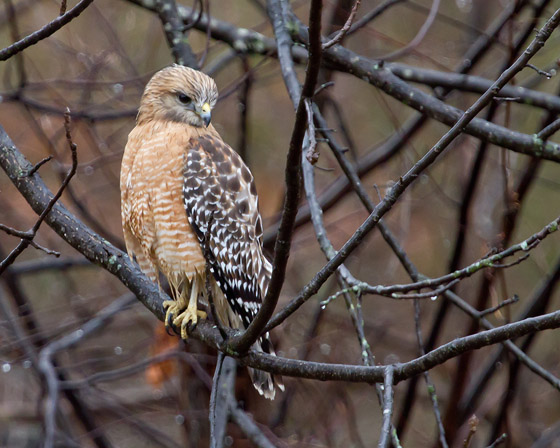
When lighting gets even darker, then the use of lens stabilization for handheld shots and higher ISOs come into play. Perfect exposure here is a must. Being off just a small amount, 1/3 of an f/stop or more underexposed, can play havoc with your image if you’re forced to lighten up your image in Photoshop. The introduction of more noise is the result of underexposed images and even if you reduce the noise, then sharpness may suffer. It’s always best to slightly overexpose your images taken in darkened lighting conditions and even more so with darker subjects against darker backgrounds such as this adult Red-shouldered Hawk. Here lens stabilization and good exposure saved this photo.
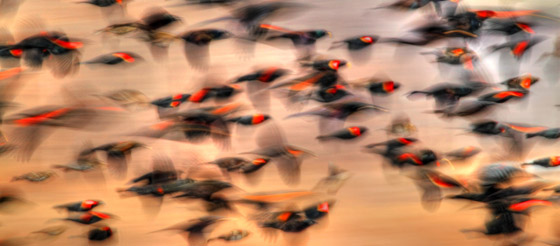
Our last pic here shows an option when lighting is so dim that higher ISOs and slow shutter speeds push your equipment to its limits. Basically, just let go and try some new things. I was fortunate prior to a trip to southern Illinois a few years ago to read an ebook by Arthur Morris and Denise Ippolito titled, A Guide To Pleasing Blurs. Had I not read this ebook I might not have tried the technique so well taught in that book. Here is one of the many shots I took of a flock of Red-winged Blackbirds on a very dark heavy overcast day. Note the background here, late fall grasses glowing!
So, the next time you look out the window and skies are dark or you see those super bright white conditions, don’t stay home, get out and explore the many possibilities available to you!!!
Get more great tips in our free weekly newsletter.
 About the Author: Vic Berardi is a raptor lover that lives in the Midwest. He is the founder of the Illinois Beach State Park Hawk Watch and every weekend of the year you’ll find him searching for hawks and photographing them. Several of his photographs have been published in a leading raptor journal and in articles he has written. During the year he gives presentations teaching others about hawks and hawk migration. Vic also photographs dragonflies and wild flowers and is always respectful of nature and its creatures.

Good pics, Vic. excellent tips as well!!
Great tips here. I love the Red-winged Blackbird shot.
Excellent article Vic, if people knew how hard it can be to get the light right in bird photography, I think we would have many more readers! 🙂
Great tips and good photos too!
Great article and some amazing photos there, Vic !
I absolutely love those Red-wings, the Barred Owl and the Red-shouldered Hawk. Beautiful ! I wish I had photos like these in my collection ! Good job. Thanks for sharing.
When I saw your subject I immediately thought of Art Morris and then you mentioned him in your text. Here’s a quote from him when talking about Bosque del Apache in the book Fifty Places to Go Birding Before You Die – “The downside is that you’ll have a lot of clear skies, which are not ideal for photography. When I’m heading out there, friends say, ‘Ihope the weather is great.’ I reply ‘No, I hope it stinks!”
That quote really got my attention. I have always thought of overcast as terrible. Time to take some advice from Vic and Art.
Excellent info, great shots!
Vic, all I can say is thanks for the wonerful advice………now all i have to do is put it to use!
great photo. I hope I can take picture as beautiful as your.
Great tips. Thanks!
I often use fill flash when I’m watching birds at my feeder. Not only can it help the beautiful colors pop, it adds a nice catch light to the eye on a cloudy day. http://www.flickr.com/photos/mully410/8236467844/in/photostream/lightbox/
good tips. really good info for those of us reluctant to go out in that kind of lighting
Great tips,
Could anyone give me some ideas on how to catch Raptors in flight,such as what glass to use, etc
Thanks
Thanks, Steve and Vic for the great tips and beautiful shots. Happy Holidays!!
Thanks for all the comments everyone!!
Great photos, I have been photographing diffrent types of birds, such as Egrets, Osprays,Blue Hearons and some Eagles, two things that help me get the photo that I seek. #1 I combine kayaking with photography. I photograph from a 14 ft touring kayak. #2 I use a 55-300 telephoto for Eagrets and such and my Eagle glass is a 120-400mm Sigma on a Kr Pentax body. not high end equipment but the kayak puts me in the position to get shots that are not possibale on shore.
Craig, have a look at this post, maybe this might help:
https://photonaturalist.com/how-to-get-sharp-photos-of-birds-in-flight/
Great advice Vic! Those images are perfect for this latest article you put together.
I guarantee you just put more photographers out in the field on cloudy days!!!
Robert
Really nice article! It’s like the old saying about fishing (just substitute “birding”): “The best time to go fishing is when you’re able to go fishing.” Don’t worry about weather or tides or wind or reports – just go!
With your great tips, we can put more tools in the toolbox to increase the chance of getting a good image under less than ideal conditions.
Thank you!
I read this article a long while ago and came back to it today. I wanted to say that if I set my camera to the same settings as yours, my photos would come out of the camera near-black.
Example:
Canon 7D, 300mm f2.8 w/1.4X, ISO 400, f5.0 @ 1/2500 second (handheld) / Rough-legged Hawk
I have a 300mm with 2X teleconverter. If I shoot even f/5.6 at just 1/1000 second, and ISO 400, my shot will be near black. What I have been doing is setting to between 1/600s and 1/1,250s at f/11 and using Auto ISO – my camera then churns out ISO readings in the thousands, even as high as 25,600 if shooting, say, a perched bird in a tree with leaf and foliage background. You can imagine the grain.
Would love to hear suggestions for this, and also for shooting when you are walking under tree cover on an overcast day.
Hi Chris, the Rough-legged Hawk shot above was shot at those settings. From what I recall from that day the sky was a very bright white and allowed me to use a faster shutter speed.
As for what settings to use in very dim light like under a tree, I would need to see some examples. Have a look at the Red-shouldered Hawk photo above. It was shot at ISO 800 and at 1/250 second.